How do I adjust the quality of time-lapse recordings?
The recording quality of time-lapse video is set when you create a custom canvas. By default, the video quality for time-lapse recording is set to 1080p and ‘Good’.
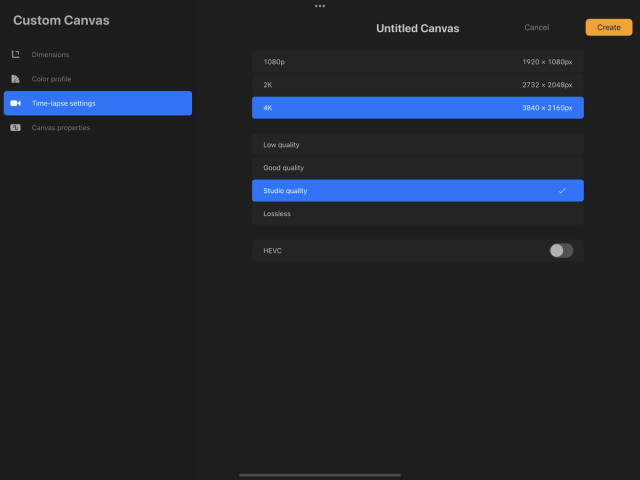
When creating a new custom canvas you can choose between the following video resolution settings:
1080p — 1920 x 1080px
2k — 2732 x 2048px
4k — 3840 x 2160px
Pro Tip
Setting your canvas’ dimensions to be the same as your time-lapse video resolution results in less video compression.
You will also be required to choose one of the following video compression quality settings:
Low quality — smallest file size ideal for quickly sharing
Good quality — a good compromise between decent video quality and smaller file sizes
Studio quality — high quality with large file sizes for broadcast-quality video
Lossless — fully uncompressed video with very large file sizes
Heads Up
Any new canvas you create uses the last time-lapse recording settings you selected. If you wish to alter your time-lapse settings, you must select the new settings you want when creating a new canvas.

In the Gallery tap New canvas → Custom canvas → Time-lapse settings
Choose a video resolution and quality from the available settings.
Finish setting up your custom canvas settings and tap Create.
Heads Up
The higher the time-lapse settings the larger your Procreate files will be. Maximum settings of 4K and Lossless will result in very large Procreate files.
Danger
You cannot adjust your time-lapse settings after creating your canvas.
Sorry. We’re having trouble copying to your clipboard.
Try directly copying the link below.