The Apple Pencil requires too much or too little pressure
The pressure applied to the iPad with the Apple Pencil controls the brush, opacity, and eraser output. More pressure means more output.
If the pressure required is unsuitable, you can make easy and detailed adjustments with the Pressure & Smoothing settings.
How to access Pressure & Smoothing settings
Tap Actions → Prefs tab → Pressure and Smoothing.
I want to use less pressure
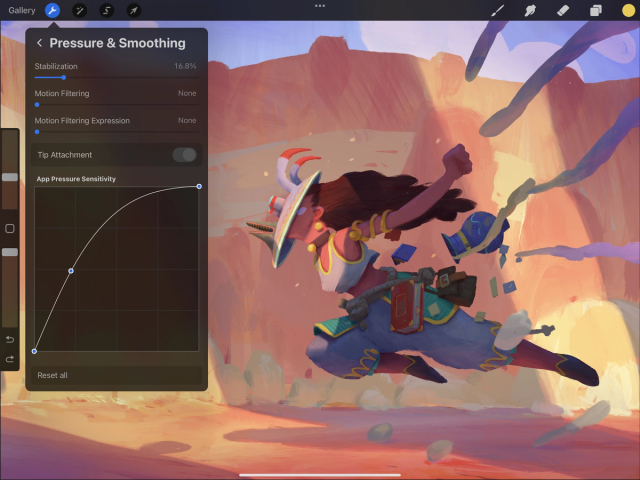
If you’re uncomfortable with how heavily you need to press to draw or erase, adjust the pressure curve to the left. It will look like the left-hand side of a steep hill, like this:

The higher output area (upper section of the vertical axis)occurs in the low-pressure area (left-hand side of the horizontal axis).
Your Apple Pencil will now produce thicker and darker lines with less pressure.
I want to use more pressure
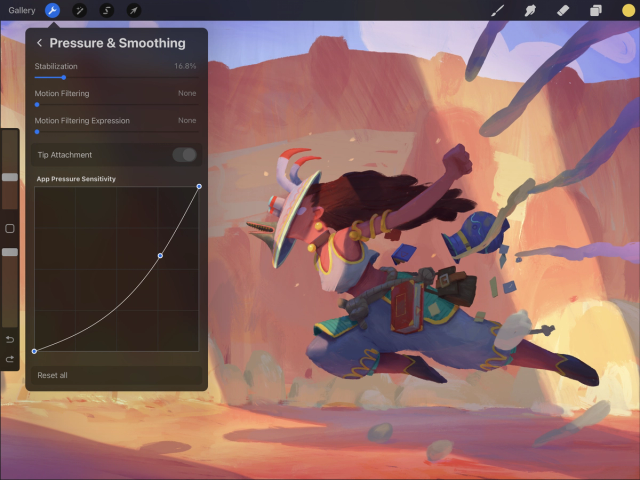
If the Apple Pencil produces darker or thicker lines too easily, and you’d like it to be less sensitive, push the curve to the right. It will look like a ramp; flatter to begin with then curving up at the end:

With this curve, the higher output area (upper section of the vertical axis) occurs in the high-pressure area (right-hand side of the horizontal axis).
This means your lines will be thinner and lighter when you're applying less pressure, and you will have to press the Apple Pencil down harder to produce darker or more intense lines.
I want to reset my pressure settings
If you want to undo changes to the curve and return to a linear curve, tap Reset All at the bottom of the Pressure & Smoothing window.
Sorry. We’re having trouble copying to your clipboard.
Try directly copying the link below.