Pocket Handbook
Sorry. We’re having trouble copying to your clipboard.
Try directly copying the link below.
Video
Record your artistic process to a Time-lapse video, and share it with the world.
Create Time-lapse Video
Time-lapse video records every step of the creation of your image. This then compiles it into a high-speed video replay you can export and share.
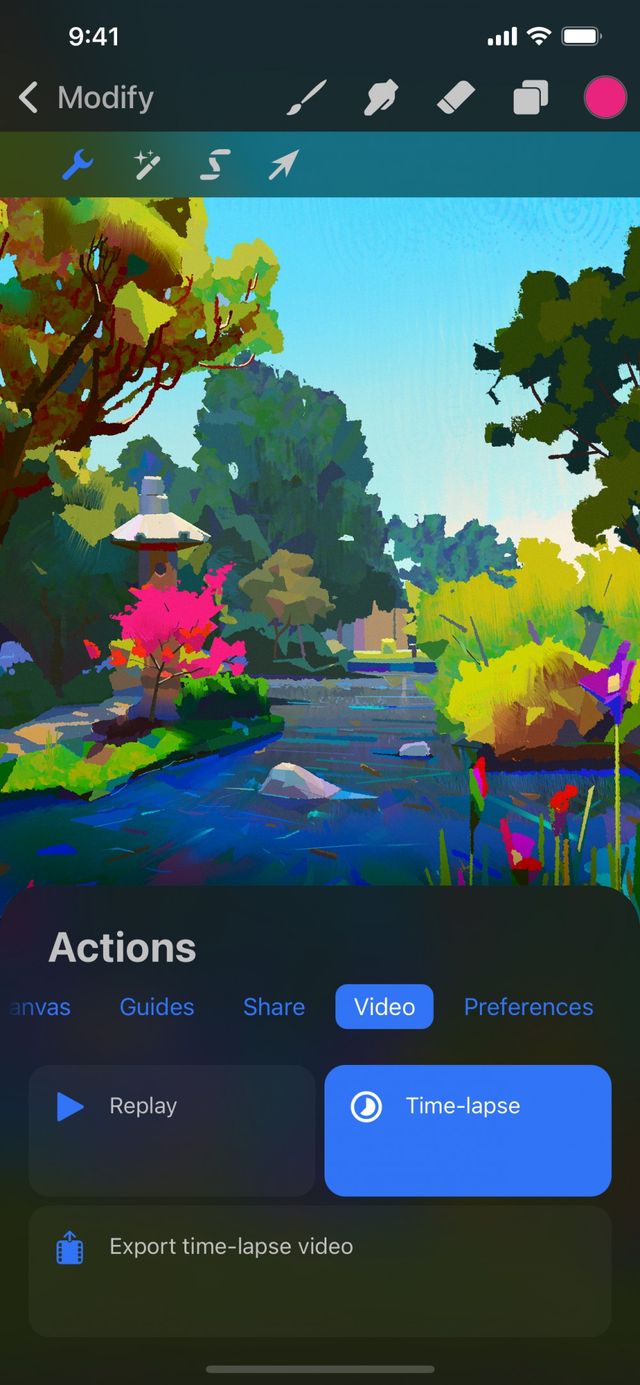
Time-lapse video is enabled by default when you create a new canvas. It will record your progress at 1080p resolution on the Good Quality setting.
These settings cannot change mid-project, but they can be adjusted before you begin.
Custom Settings
Create a custom canvas to tweak your Time-lapse Video.
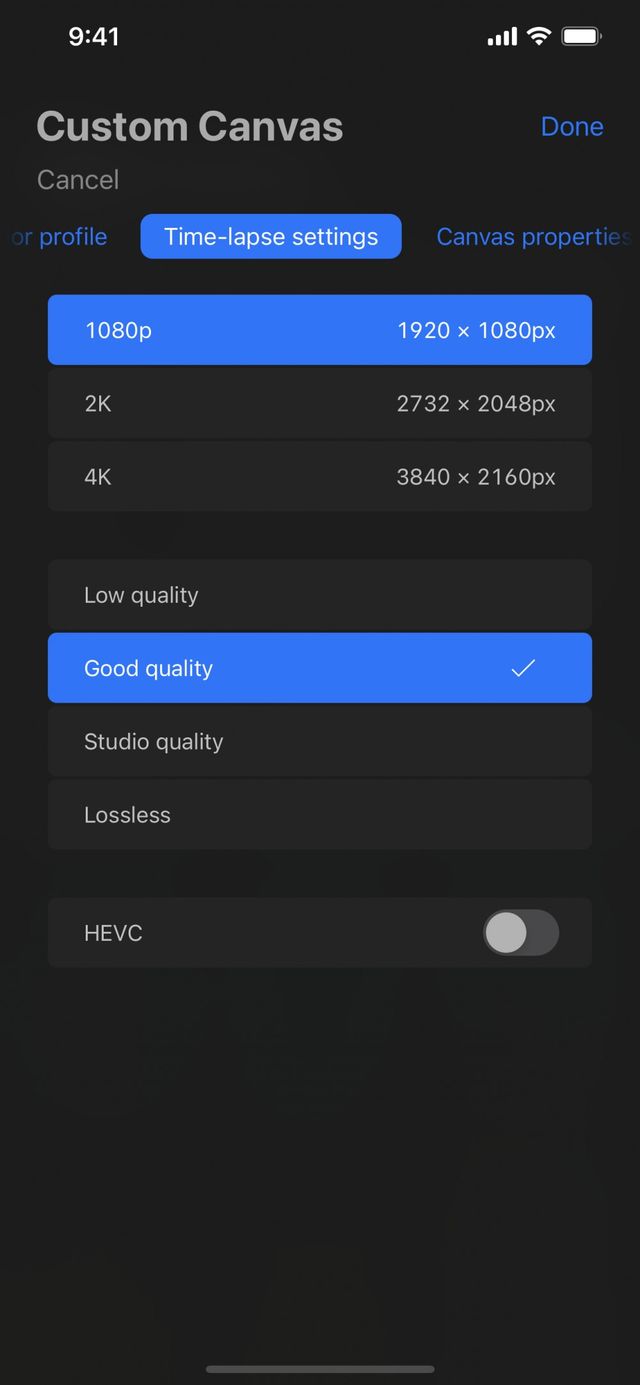
From the Gallery, tap the + button in the top right of the screen. This will bring up the New Canvas menu. In the top left of that menu is Custom Size. Tap this to bring up the Custom Canvas screen. Tap Time-lapse settings.
From here, you can tweak the Time-lapse Settings for your new Canvas. Select the resolution of your video from 1080p to full 4K. Tweak recording quality settings from Low (small files, good for sharing) to Lossless (large files with no loss of detail).
HEVC is a new form of video compression for advanced motion graphics creation. It is off by default, but can be toggled on.
When you’re happy with your Time-lapse settings, tap Done.
Play, Pause, and Share Time-lapse Video
View and control your Time-Lapse video anytime.

Replay
Preview your Time-lapse video without leaving Procreate Pocket.
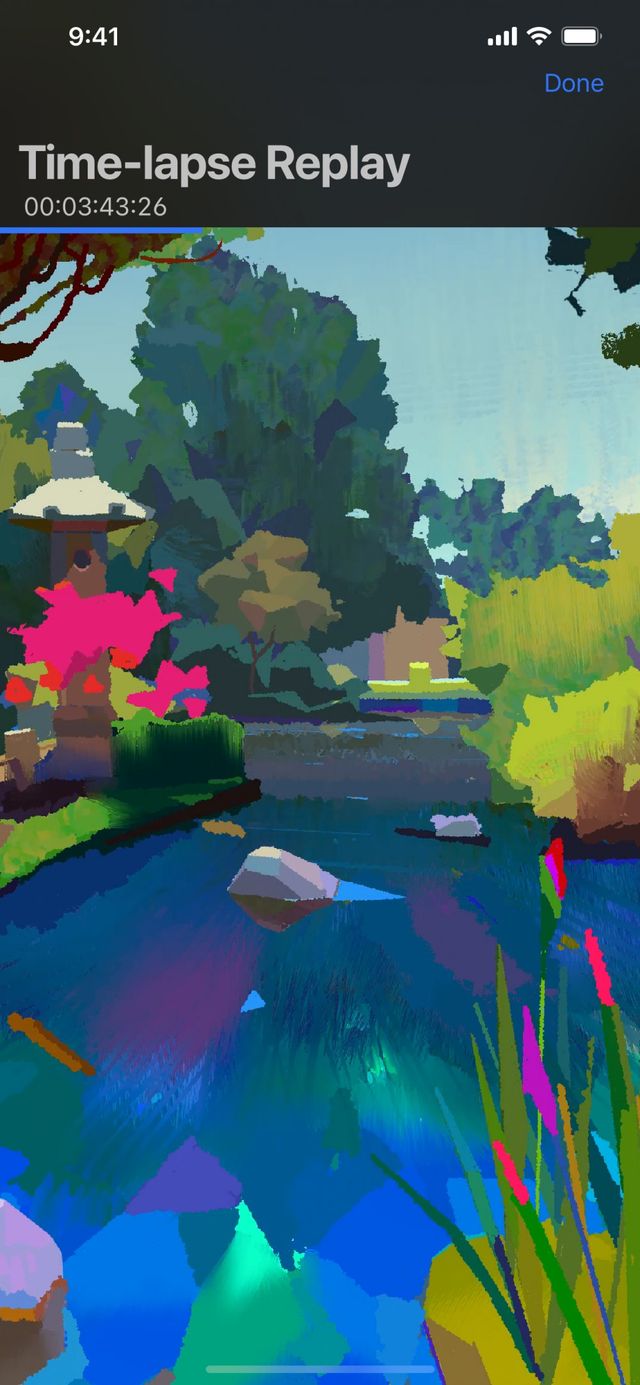
Tap Modify > Actions > Video > Replay.
This plays back your video within Procreate Pocket on a loop, at 30 frames per second. A counter on the top right of the screen displays your video runtime.
To scrub backwards and forwards through the replay, drag your finger left and right across the canvas.
You can pinch-zoom and move around the canvas as normal while the video plays. This allows you to focus in on details.
To exit the replay and return to your artwork, tap Done.

Pause
Pause your recording to create an edited Time-lapse video.
You can stop and start your Time-lapse recording at any time.
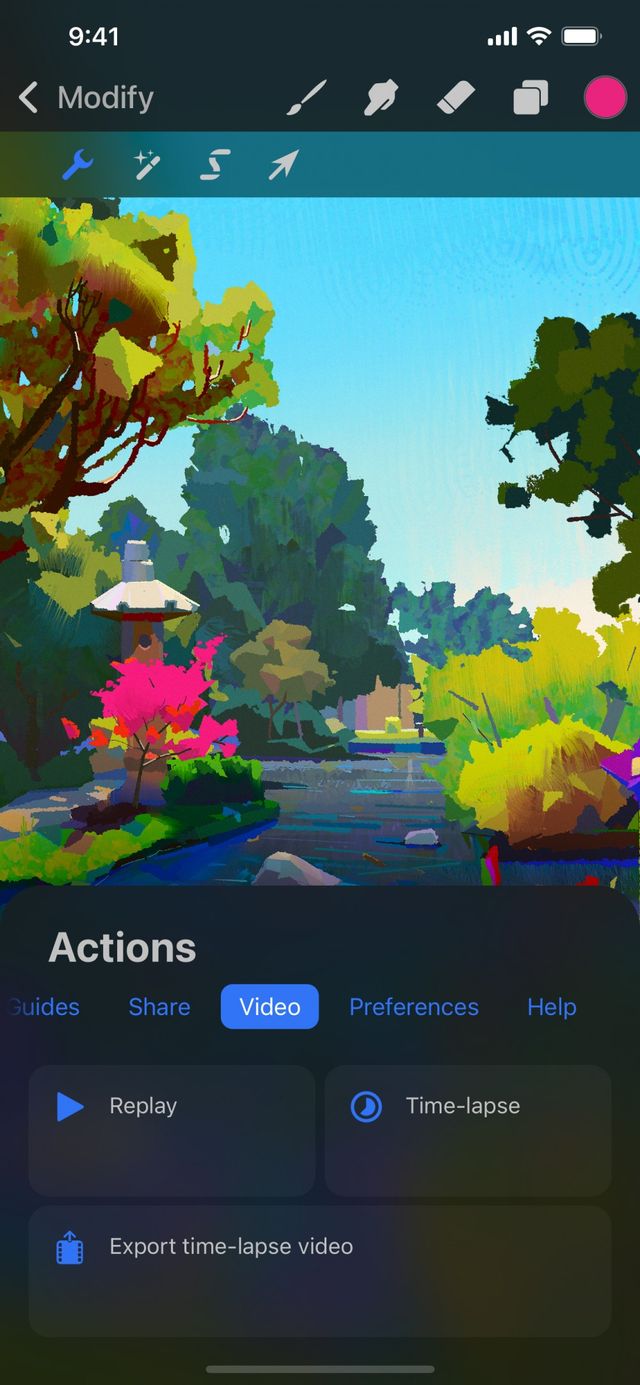
Tap Modify > Actions > Video, and tap Time-lapse off. The Time-lapse button should change from dark blue to gray.
Procreate Pocket then asks if you wish to purge the existing video. If you choose Purge, all the video recorded on this canvas so far is deleted. This cannot be undone.
If you only wish to pause the recording, tap Don’t Purge. Pausing allows you to edit out the parts of your process that you don’t want to display. This can create a shorter and more shareable video.
To resume recording, turn Time-lapse back on. The Time-lapse button should change from gray to dark blue.


Export
Share your Time-lapse video with the world.
Sharing Time-lapse recordings is a great way to show others your technique.
Tap Modify > Actions > Video > Export Time-lapse video.
Choose between Full length and 30 Seconds.
Full length exports your entire process to a high-speed video. This video will encompass your entire process and be of a variable length.
30 Seconds cuts the video down to thirty seconds by removing frames from the video to speed it up. This process uses an algorithm that preserves the most important frames in the video. The greatest number of frames are usually preserved early on in the artwork creation when details are still rapidly changing.
You can export your video to any service or app connected to the iOS Files interface.
Pro Tip
Sharing process videos is a great way to get people interested in your art. Download a video editing app on the iPhone to recut and combine various Time-lapse videos with music to create a moving portfolio.
Disable Time-lapse Video
Turn recording off completely.
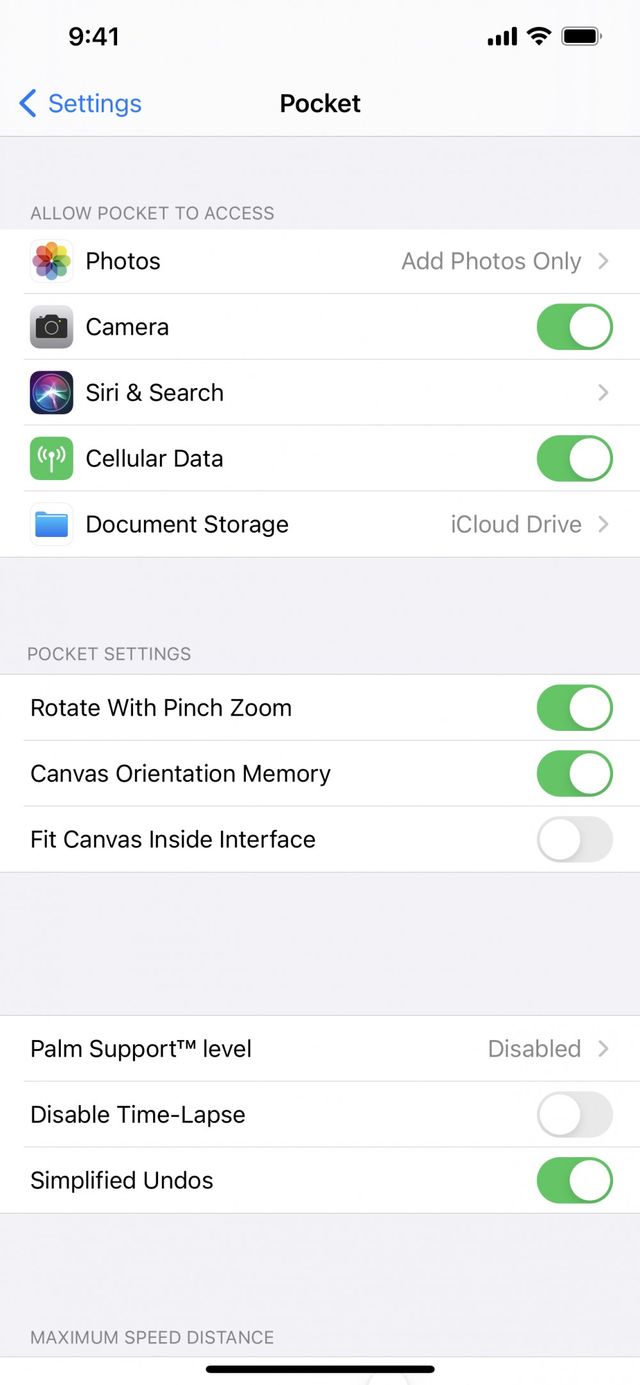

Time-lapse video is on by default. Using the Time-lapse button in Actions pauses the recording on your current canvas only. Recording will continue on any other canvases, and on all new canvases.
To switch recording off completely across all current and future documents, tap Modify > Actions > Help > Advanced Settings.
This will take you out of Procreate Pocket and into to the iPhone Settings > Procreate Pocket menu. Toggle the Disable Time-lapse switch.
Remember, this turns off Time-lapse by default on all documents from this point onwards. It will not be enabled on any new documents you create, and it does not record when switched off. You cannot go back and retrieve a recording of a document afterwards if you change your mind while Time-lapse is disabled.
Time-lapse will stay deactivated until you repeat the process above to switch it back on.
Pro Tip
You can also access Advanced Settings by tapping on the iPhone Settings icon. From here, scroll down the list of apps to the Procreate Pocket section.
Sorry. We’re having trouble copying to your clipboard.
Try directly copying the link below.
Still have questions?
If you didn't find what you're looking for, explore our video resources on YouTube or contact us directly. We’re always happy to help.