Pocket Handbook
Sorry. We’re having trouble copying to your clipboard.
Try directly copying the link below.
Noise
Add and control grain in your image for a more organic, vintage feel.
Randomize the brightness and color of pixels to give your layer a grainy, analog feel. Choose from three different types of Noise — Clouds, Billows and Ridges. Adjust the Scale, Octave and Turbulence for granular control of how Noise appears.


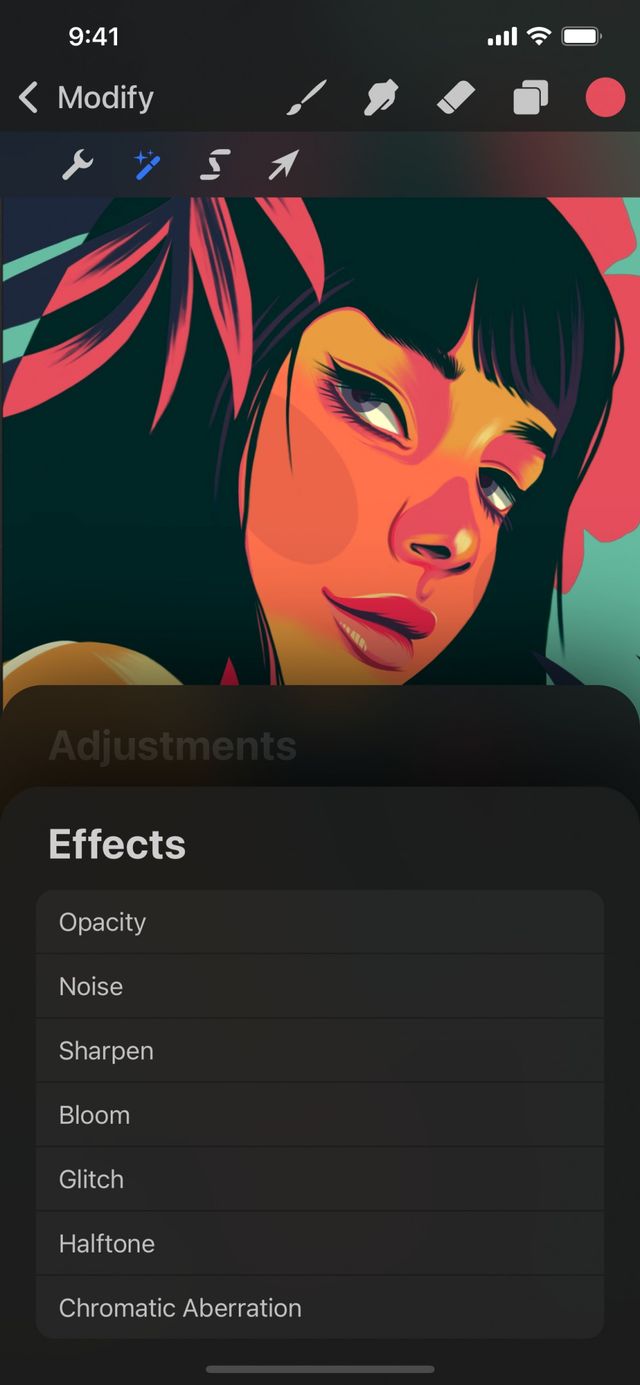
Tap Modify > Adjustments > Effects > Noise to enter the Noise interface.
Slide right and left on the canvas to change the amount and intensity of Noise.
At the top of the screen, you’ll see a bar titled Noise. This bar displays the percentage of Noise applied to an image.
Initially, this is set at 0% Noise. Drag your finger to the right to increase the amount of Noise, and to the left to reduce.
Interface
Control how Noise behaves and appears on your image. Do this with the Noise Style buttons and Scale, Octaves and Turbulence Sliders.
There are three different Noise Style buttons to alter how Noise appears:
Clouds sets the most coarse looking Noise, which at large scales appears cloud-like.
Billows looks similar to Clouds, but adds a billowing effect that gives a finer detailed and textured look to the Noise.
Ridges makes the Noise appear even more detailed. At large scale this gives it a harder edge and similar look to light reflecting on water.
Noise Settings
There are three different Sliders that adjust the appearance of Noise:
Scale adjusts the size of the Noise.
Octaves adjusts the complexity and adds more detail to the Noise.
Turbulence twists and warps the Noise, again adding more complexity and detail.
The channel buttons are found at the bottom of the Settings menu. By default Noise is set to a monochromatic black & white. The Channels allow you to set the color of the Noise and turn Additive Noise on or off:
Multi sets the Noise to multicolored.
Additive toggles Additive Noise on and off. With Additive Noise on Noise becomes transparent, and lets your image show through even when set to 100%. With Additive Noise off the Noise is opaque, and will completely obscure your image with Noise when set to 100%.
Commit Changes
Commit all changes with one touch.
To commit your changes and leave Adjustments, Tap the Adjustments icon again.
To commit to changes and stay in Noise, Tap the canvas to invoke Adjustment Actions and Tap Apply.
Sorry. We’re having trouble copying to your clipboard.
Try directly copying the link below.
Still have questions?
If you didn't find what you're looking for, explore our video resources on YouTube or contact us directly. We’re always happy to help.

