Pocket Handbook
Sorry. We’re having trouble copying to your clipboard.
Try directly copying the link below.
Brush Studio
The Brush Studio guarantees your brushes will be as unique as your art with its breathtaking range of customization options.
Overview
Brush Studio offers Settings for existing brushes along with the ability to create your own brand new brushes. Tweak the basics, or dive deep to discover a versatile range of effects.
There are two ways to approach Brush Studio. You can dive in knowing what you want to create, and adjust settings until you reach your goal. Or you can play, using experimentation, serendipity and exploration to build something that feels good.
Tap the Brush button to open the Brush Library, then tap New brush to enter the Brush Studio.
Pro Tip
You can enter the Brush Studio in two ways: tap an existing brush to edit it, or tap New brush from the Brush menu. Both options take you to the same Brush Studio interface, with one difference. The Import button is only available when you enter the Brush Studio by tapping New brush.
Interface
The Brush Studio interface divides into three parts: Attributes, Settings, and Drawing Pad.
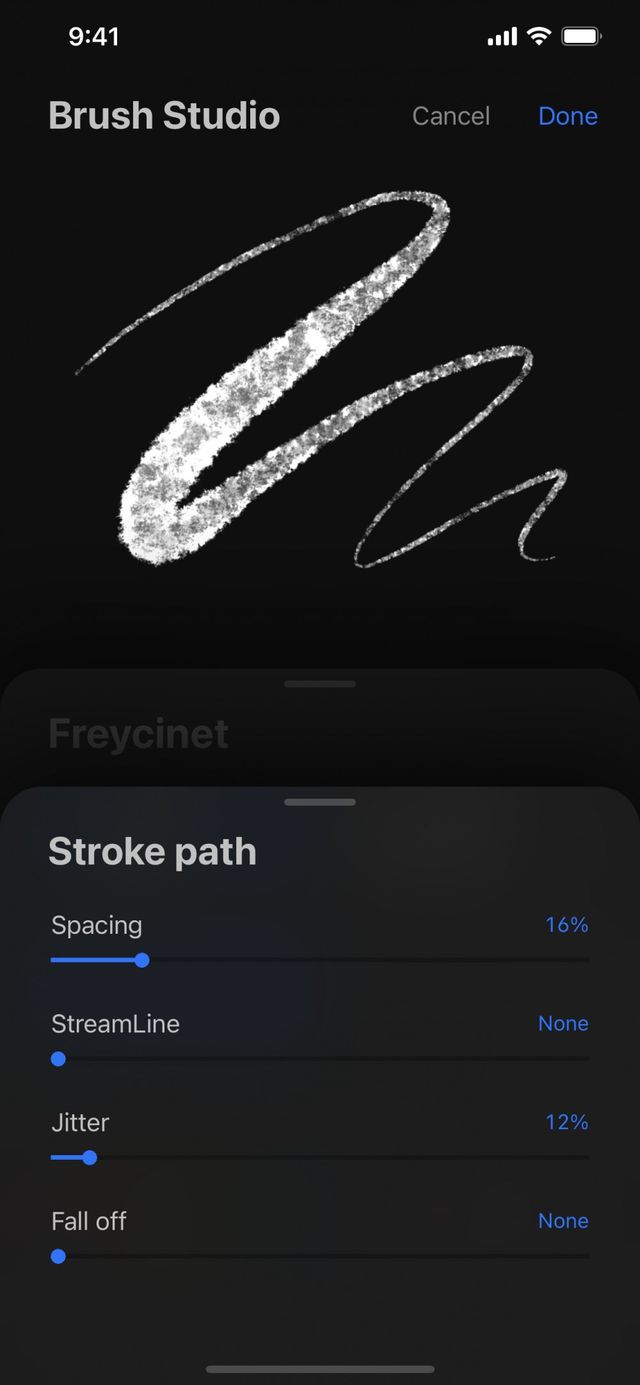
Preview your brush in the Drawing Pad to see your changes in action without leaving the Brush Studio.
The Drawing Pad is a preview window for your brushes. Think of it as a notepad you might keep at hand to test the color of your markers. Drawing Pad sits inside the Brush Studio to give you a place to preview and test your brush changes. Draw shapes and scribbles into it to see differences in how your brush responds. As you change various settings, the scribbles in the Drawing Pad update in real time to show how your changes affect your brush.
This saves you from having to leaving the Brush Studio or interrupting your creative flow when brush testing.
To clear the Drawing Pad, scrub it with three fingers.
Tap any attribute in the menu to tweak settings for that attribute. You can see the result update live in the Drawing Pad.
Each of the 11 aspects of your brush can adjustable with a wide range of settings.
You can adjust the shape and grain of your brushes, tweak the appearance of your brush Stroke Path, and adjust how Procreate Pocket renders the end result. Play with Dynamics to set how your brush responds to speed and how colors shift in response to input. Add Wet Mix to change the way your brush moves pigment around the canvas, set limits on your Brush Properties, and sign your creation.
All these attributes are explored in detail below.

Settings
Adjust multiple brush attributes in each Settings category with sliders, toggles, and other simple controls.
When you select an attribute from the left menu, you’ll find a menu of adjustable settings for it. The available settings are different for each attribute, and covered in detail in Brush Studio Settings .
Brush Studio Cards
The card system in Brush Studio is designed to give you more or less space to work with depending on what feature you wish to use.
Tapping on a brush invokes the Attributes menu that sits in a pop-over card. The handle at the top of this card can be used to extend or minimize the card.
To view all brush Attributes, tap and hold the handle and then swipe up to extend the card.
To reveal alternative colors to test your brush with, tap and hold the handle and then swipe down to minimize the card.
Tapping an Attribute will invoke the Settings menu for that Attribute.
Find out more about Attributes and Settings in Brush Studio Settings .


How Brushes Work
Read a brief overview of how Procreate brushes work to better understand what each attribute controls.
A Procreate brush contains a Grain (texture) inside of a Shape. When you draw a stroke with that brush, you are dragging that shape and the texture within it along a pathway.
You can set a Taper on that pathway so that your strokes start thin, reach full thickness, then tapers off again as you finish the stroke. This mimics the behavior of physical brushes and pencils.
Change the Rendering to manage how glazed or blended your brushstrokes appear.
Add Wet Mix attributes to mimic the behaviors of wet media like paints. You can adjust how much paint is loaded onto your brush and how it mixes into or drags through pigment when it comes into contact with other areas of color.
Color Dynamics let you create color effects only achievable in digital media. This allows you to make a brush that can change color randomly. Or let your brush shift through different hue, saturation or brightness based on the pressure.
With Dynamics you can set your brush to respond to speed, or introduce an element of randomness using jitter.
Set limits on brush behavior and how your brushes look in the Library using Properties, and sign your new creation with About this Brush.
Pro Tip
At times you may adjust a setting and find that nothing seems to change in your brush. Sometimes one setting may cancel out another. If this happens try adjusting other settings, especially those immediately around it.
Dive deep into the eleven attributes of Procreate Pocket brushes and their settings in Brush Studio Settings .
Sorry. We’re having trouble copying to your clipboard.
Try directly copying the link below.
Still have questions?
If you didn't find what you're looking for, explore our video resources on YouTube or contact us directly. We’re always happy to help.
