Dreams Handbook
Sorry. We’re having trouble copying to your clipboard.
Try directly copying the link below.
Drawing layers
Drawing layers stack image elements on top of each other to build up a single piece of content. Overlap objects without altering work you've already done. Edit and delete elements with total creative freedom.
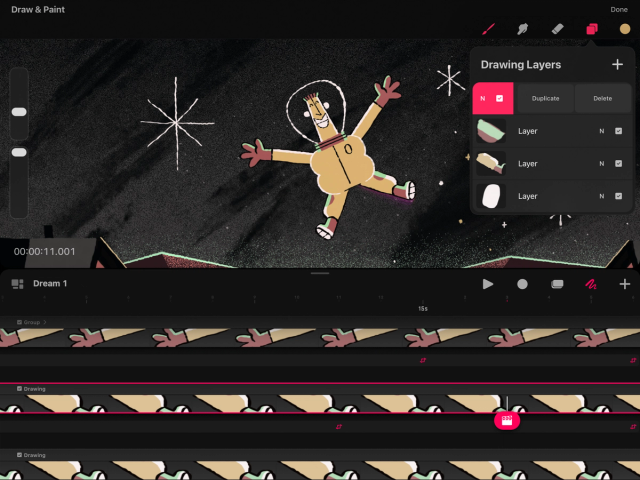
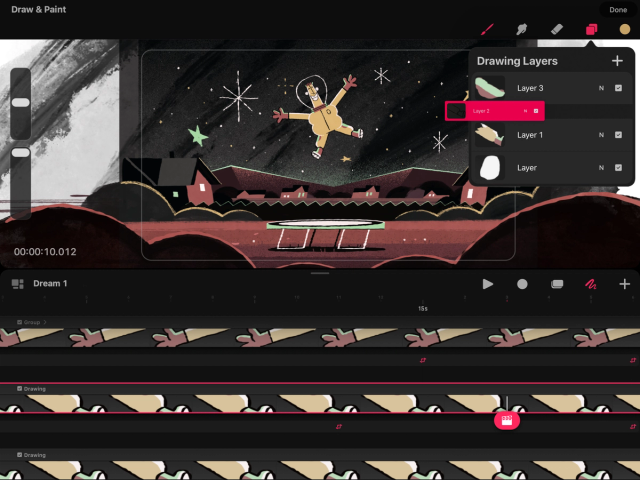
Drawing Layers panel
The Drawing Layers panel offers an organized interface with a variety of options that allow for experimentation as you draw and paint.
Tap to open and close the Drawing Layers panel.
Tap the add button in the top-right corner of the Drawing Layers panel to create a new layer.
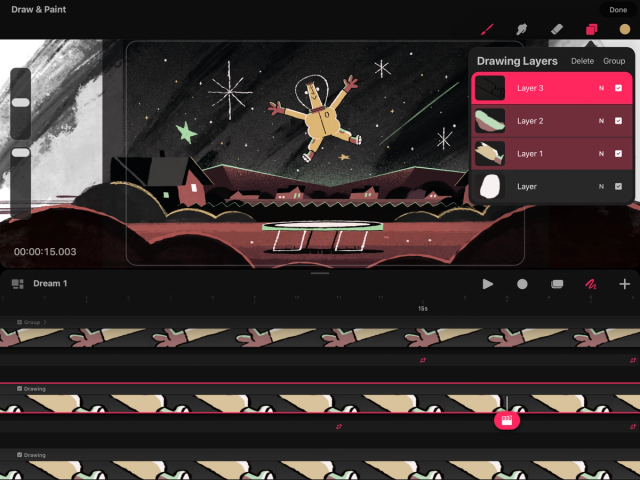
Any changes you make on the Stage will affect your currently selected layer. Procreate Dreams identifies your current selected layer by highlighting it. Tap a layer to select it. To select multiple layers, swipe right on each one. Delete and Group options will then appear.
These modes blend the contents of multiple layers together to create and mix a variety of visual effects.
Tap the small letter on the right-hand side of a layer to show its blend mode options.
Select the blend mode you wish to apply to your layer.
Learn more about blend modes and their various options in the Procreate handbook.
Use the visibility checkbox to hide or show a layer.
Customizable layer names help track which content sits on what layer and keep your artwork organized.
To rename a layer:
Tap a layer to show the layer options context menu.
Tap Rename.
Delete layers
Remove unwanted or no longer needed layers using delete.


Swipe from right to left on any layer to reveal the delete button.
To delete multiple layers, swipe left on swipe right on two or more of the layers you want to remove. A delete option will then appear at the top of the Drawing Layers panel.
Rearrange layers


Tap and hold on the layer or layer group to pick it up. Now drag it up or down in the layer order. Release it in the preferred position.
If you’d like to select multiple layers, swipe right on each layer then tap and hold and drag it to the preferred position.
Group layers


To group a layer, select it via tap-and-hold or swiping right. Then drag it onto the layer or layer group you want to group it with.
If you select multiple layers by swiping right an option to group them will appear on the top right-hand side of the Drawing Layers panel.
Layer options
Use the layer options context menu to access options such as rename and clear. Tap on a selected layer to open layer options.
Customize your layer names to better organize your work.
Add a layer mask to the parent layer underneath. Layer Masks are edited using grayscale. Erasing or painting in black hides parts of the parent layer, and painting in white reveals parts. Varying shades of gray alter the content with corresponding levels of opacity. Layer masks can also be inverted to achieve the opposite hiding or revealing effect of your original masking. Read more about layer masks in the Procreate handbook .
Clips an active layer to the layer underneath it. The visual content of the active clipped layer behaves like a window, controlling the visibility and transparency of the parent layer below it.
Clear the contents of the selected layer.
Blend modes
By default, content on a layer is set to Normal and opaque, obscuring the contents of layers underneath it. Blend modes open all kinds of interesting visual possibilities as to how two layers can interact and blend.
On the right-hand side of each layer, you'll see one or more letters. These tell you which blend mode is active on that layer. Normal mode is active by default, shown by the letter 'N'.
Tap the letter N to open the blend mode menu.
Heads Up
If a layer already has a non-default blend applied, a different letter or set of letters will be visible.
Opacity controls how transparent a layer is.
In normal mode, full opacity means solid objects on your layer completely obscure objects on the layers below. In other blend modes, opacity can affect visual elements like color intensity or darkness.
To adjust opacity:
Move the slider left to make your layer more transparent.
Slide it to the right to make the layer more opaque.
The blend mode menu has two parts. The name of the current blend mode, and the opacity slider.
Scroll through the list of blend modes to choose a mode. As you scroll, each blend mode will apply to your layer to preview the results.
Tap anywhere outside the list to select and close it.
Learn more about blend modes and their various options in the Procreate Handbook.
Sorry. We’re having trouble copying to your clipboard.
Try directly copying the link below.
Still have questions?
If you didn't find what you're looking for, explore our video resources on YouTube or contact us directly. We’re always happy to help.


