Procreate Handbook
Sorry. We’re having trouble copying to your clipboard.
Try directly copying the link below.
3D
Edit a 2D texture, paint through a 3D object, or adjust the lighting then bring it to life in AR.
3D Actions
Unlike other Actions in this menu, 3D Actions only become visible when working on a 3D OBJ or USDZ file.
To access 3D Actions open a 3D OBJ or USDZ file from Gallery → tap Actions → 3D.
Unwrap a 3D object into a flat 2D texture map to block out base colors, touch up your 3D painting, work on detail, and more.
Open an OBJ or USDZ file in Gallery, tap Actions → 3D → Edit 2D texture toggle.
Show 2D texture will unwrap a 3D object to reveal the Base Layer as a flat 2D texture map. 2D Texture Maps can look very abstract, but are very useful for adding details, textures or adding large areas of base color. Painting on a 2D Texture map works exactly the same as standard 2D painting in Procreate.
Toggle off Show 2D texture to return to a 3D view of your object.
For a full explanation of how Layers work, check out the Layers section in the 3D chapter of this handbook.
Painting through a mesh is handy when you want to paint one part of a 3D object and another object in a different mesh is getting in the way.
Open an OBJ or USDZ file in Gallery, tap Actions → 3D → Paint through mesh toggle.
Toggle Paint through mesh on to have your brush strokes ignore and go through any unselected meshes. This can help paint hard-to-reach areas in models, and paint a 3D object when another object is directly in front of it.
Toggle off Paint through mesh to return to the standard 3D Painting mode.
Access the Lighting Studio for a 3D object to adjust and show your object in its best light.
Open an .OBJ or .USDZ file in Gallery, tap Actions → 3D → Edit Lighting.
Edit Lighting opens the Procreate Lighting Studio. Here you can add lights and adjust their hue, saturation and intensity. You can also add environmental lighting too. For a full explanation of how Lighting Studio works, check out the Lighting Studio section in the 3D chapter of this handbook.
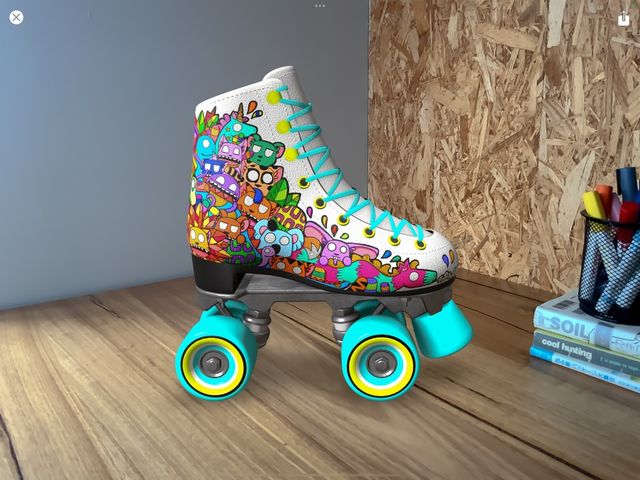
Take a painted 3D object and place it in the real world using augmented reality.
Open an OBJ or USDZ file in Gallery, tap Actions → 3D → View in AR. The first time you do this Procreate will ask permission to use the iPad’s camera. Selecting No will prevent you from using this feature.
Once you have selected View in AR, Procreate will access your camera and place your object on the first flat surface the camera can detect. You may need to move the camera around an area before Procreate detects a surface to place an object.
Heads Up
Note that View in AR uses ambient lighting provided by your iPad’s camera and not the Lighting Studio settings.
If you wish to turn off View in AR or move the object and place it on a different surface, tap X in the top left-hand corner of the AR window. To place an object somewhere else, tap View in AR again.
To export objects in View in AR mode tap the Share icon in the top right of the window. For a full explanation of exporting 3D works, check out the Share section in the Actions chapter of this handbook.

Sorry. We’re having trouble copying to your clipboard.
Try directly copying the link below.
Still have questions?
If you didn't find what you're looking for, explore our video resources on YouTube or contact us directly. We’re always happy to help.
