Procreate Handbook
Sorry. We’re having trouble copying to your clipboard.
Try directly copying the link below.
Warp
Fold and wrap your artwork in mind-bending dimensions with Warp.
Warp Mesh
Move the Warp mesh to wrap and fold your content.


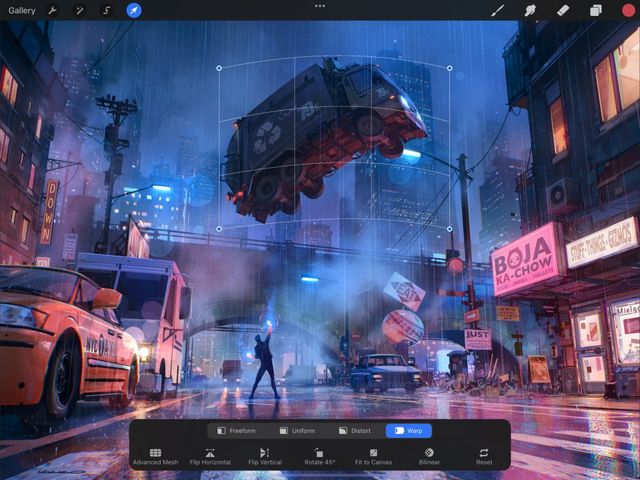
Tap the Warp button in the Transform toolbar. The bounding box in Warp mode has a solid border rather than the moving dashes of the other modes. Inside this bounding box you’ll see the Warp mesh - a grid that overlays your content like a net.
You can drag the corners, sides, or the inner mesh to warp any part of your content in any direction. You can even drag a corner node towards the middle of the mesh to fold part of your image over itself.
Node Control
Wrap parts of your image over other parts — or under them.


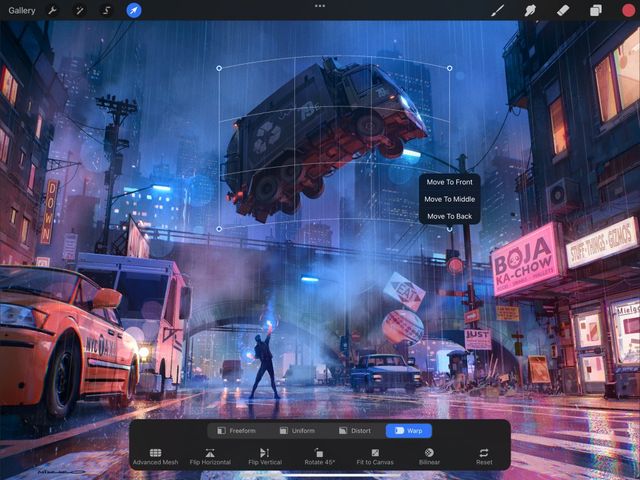
Tap a node to invoke positional controls.
You can now move that node to the front, middle, or back. These positions determine whether your node overlaps or underlaps others.
When you move a node without invoking this menu, it will move to the front by default.
Advanced Mesh
For precise control, add and individually adjust extra nodes in your mesh.


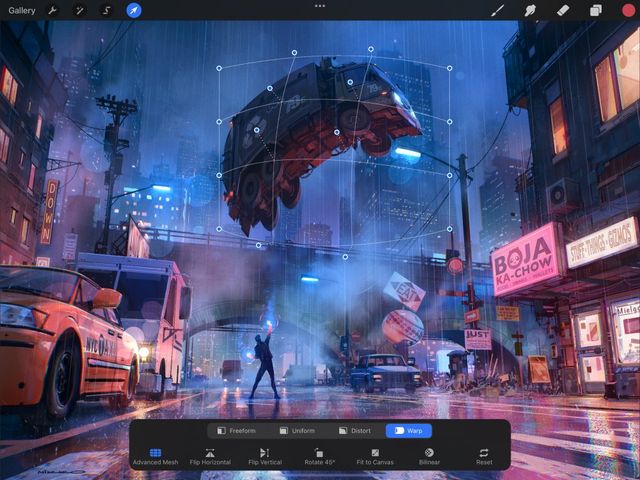
Tap the Advanced Mesh button in the Transform toolbar to invoke more nodes for finer control.
This mode places a node on every intersection of the Warp mesh. Now you can manually adjust each control point, instead of dragging a section of the mesh.
Sorry. We’re having trouble copying to your clipboard.
Try directly copying the link below.
Still have questions?
If you didn't find what you're looking for, explore our video resources on YouTube or contact us directly. We’re always happy to help.