Procreate Handbook
Sorry. We’re having trouble copying to your clipboard.
Try directly copying the link below.
Perspective Guide
Perspective Guides offer adjustable vanishing points. Use these to construct realistic objects and backgrounds in your artwork.
Customize
Set up and adjust your Perspective Guide.
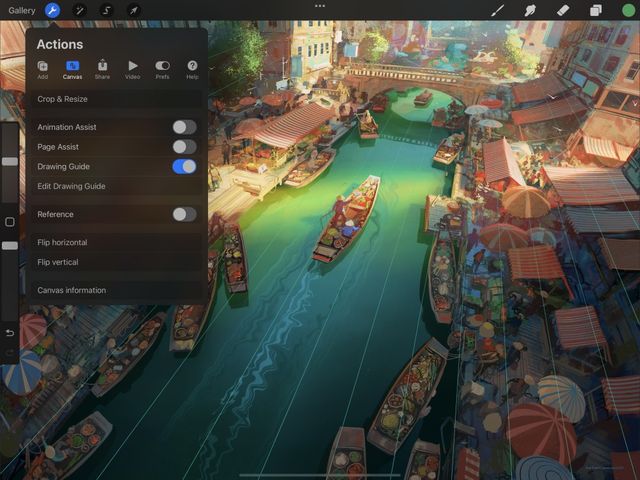
In Actions → Canvas, tap Edit Drawing Guide. This will take you to the Drawing Guides screen.
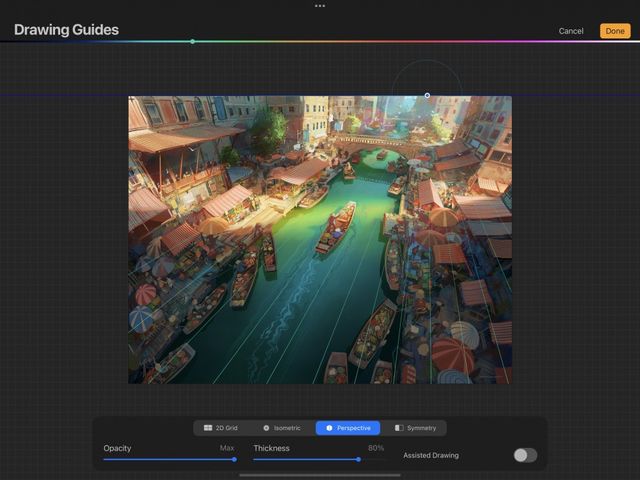
Tap the Perspective button on the bottom of the screen.
Your Perspective Guide appears as thin lines that overlay your artwork. You can adjust the look and behavior of your guide with the following options.

Position and Rotation
Drag the blue nodes and horizon line to adjust the exact position and angle of your grid lines.
Add Vanishing Points
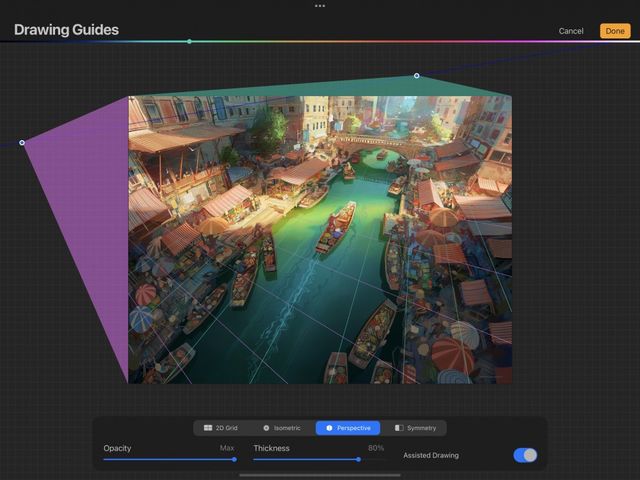
Tap anywhere on the screen to create a vanishing point. You can create up to three vanishing points, giving you the option of one-point, two-point, or three-point perspective.
Drag the individual nodes to adjust your Perspective Guide.
One-Point Perspective
One-point perspective, also called parallel perspective, is the simplest form of perspective. All surfaces in the image that face the viewer appear as their true shape, without any distortion: vertical lines and horizontal lines are parallel with the edges of the canvas and the horizon line of the artwork.
Only the surfaces that travel towards / away from the viewer are distorted: these lines all converge towards a single vanishing point - the ‘one point’ in ‘one-point perspective’.
Two-Point Perspective
In two-point or angular perspective, only vertical lines are parallel. All horizontal lines converge towards either of two points on the horizon line. This type of perspective offers a more realistic result than one-point, but doesn’t have quite as much depth as three-point perspective.
Three-Point Perspective
In the most complex but realistic form of perspective, all lines recede towards one of three vanishing points. This mimics the way we see the real world: objects recede away from us on every axis. This gives structures in your artwork believable depth, width, and height.
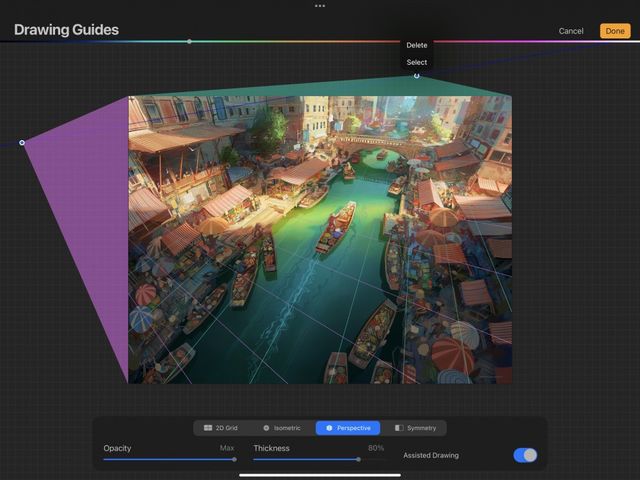
Remove Vanishing Points
Tap on a vanishing point, then tap Delete to remove it.
Appearance
Adjust the color of the guide lines using the hue bar at the top of the Drawing Guides screen.
Adjust the thickness of the guide lines from invisible to noticeable.
Adjust the transparency of the guide lines from invisible to opaque.
Drawing Assist automatically adjusts your strokes to match the direction of the guide lines.
Cancel or Commit
To return to the canvas without making a change, tap Cancel. To commit your changes, tap Done.
Sorry. We’re having trouble copying to your clipboard.
Try directly copying the link below.
Still have questions?
If you didn't find what you're looking for, explore our video resources on YouTube or contact us directly. We’re always happy to help.
