Procreate Handbook
Sorry. We’re having trouble copying to your clipboard.
Try directly copying the link below.
Brush Library
Edit, organize, share and explore the wealth of versatile brushes built into Procreate.
Interface
Organized into themed categories, the Brush Library offers hundreds of brushes. This offers you endless scope for artistic experimentation.
Brush Button
Shaped like a paintbrush, the Brush button sits in the top right menu bar of the Procreate interface. Tap it once to activate the Brush tool, and tap it again to bring up the Brush Library.
Pro Tip
You can also bring up the Brush Library by tapping the Smudge or Erase tools. When exploring what the brushes can do, painting with them is the best way to observe their effects.
The left panel of the Brush Library lists the default Brush Sets sorted by medium and style.
Scroll the list to navigate all the Brush Sets, and tap a Set to view the brushes it contains on the right. When you select a Brush Set, its icon will light up blue.
The right hand panel of the Brush Library lists all available brushes in the currently selected Brush Set.
Tap a Brush Set to browse the brushes it contains. The brush list displays the name of each brush and a preview of the stroke it makes. Scroll the list to navigate, tap a brush to select it, then tap on the canvas to begin painting.
Tweak the settings for your brush or build a new brush from the ground up.
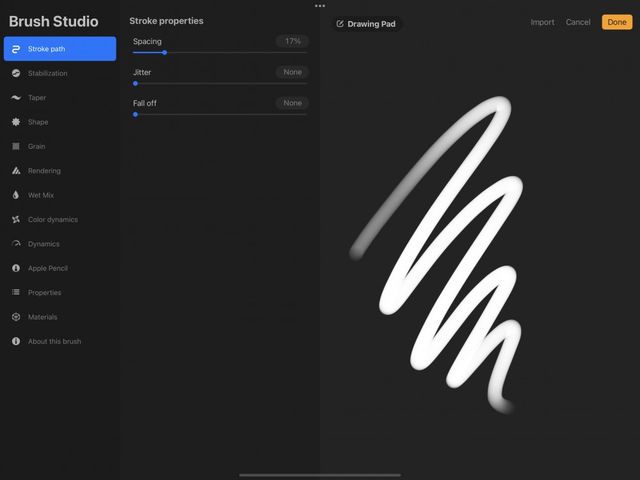
The Brush Studio contains the settings to adjust existing brushes and create new ones. There are two ways to access it. Tap the + button at the top right of the Brush Library to begin making a new brush. Or, tap on your selected brush to begin editing existing settings.
The Brush Studio offers you total control over every aspect of your brush. Here can alter shape, grain, behavior, color, responsiveness, opacity, taper, and so much more. With hundreds of settings on offer, you can create limitless combinations. Or, start from scratch and build truly original tools to suit the way you work.
Learn more about changing settings and designing brushes in Brush Studio .
Pro Tip
Procreate always remembers your settings. This means you can switch between multiple brushes without losing the adjustments you’ve made to them along the way.
Recent and Pinned Brushes
Access up to eight of your most recently used brushes, or pin your favorites so they are always ready to use.
Recent Brushes
Find your Recent brushes at the top of the Brush Library sets. Access these brushes by tapping Paint, Smudge or Erase and then tapping Recent. Up to a maximum of eight individual brushes are automatically added to the Recent set as you select and use them.
To find the original set a brush in Recent belongs to, swipe left on the brush and then tap the Find button. This will jump you to the brush’s home set and highlight the activated brush.
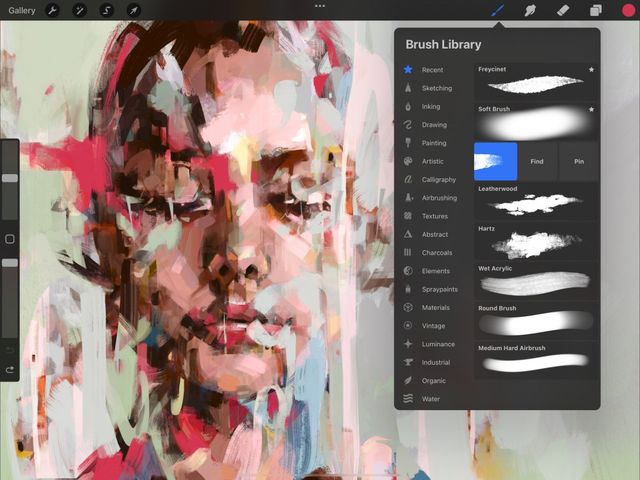

Pinned Brushes
To pin a brush, swipe left on the brush in your Recent set and tap the Pin button. This will keep the brush permanently at the top of your Recent set. You can easily identify pinned brushes by the star symbol in the top right hand corner. To unpin a brush, swipe left on the brush and tap the Unpin button.
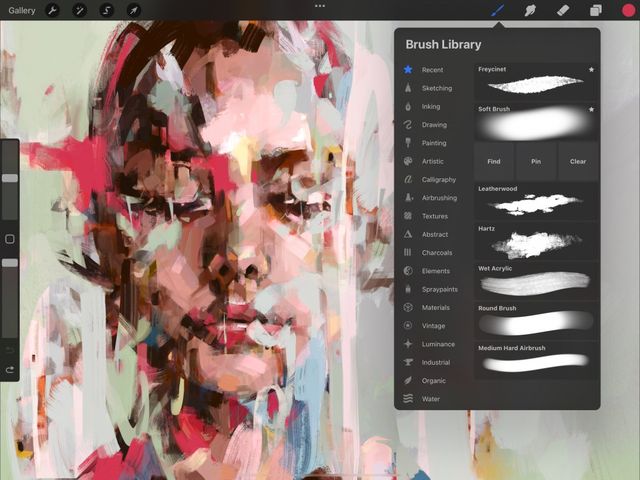

Pro Tip
No longer need a pinned brush, or want to delete a brush from Recent? Swipe left on the brush in Recent and tap the Clear button. This will delete the brush from Recent, but keep the brush in its original home set.
Brush Set Categories
Discover the 18 versatile, hand crafted brush sets that form the core of Procreate’s Brush Library. There’s a brush and category to suit every style.
Some of Procreate’s brushes are realistic. Some are fantastical. The idea behind these brushes is to give you a wide range of useful tools. These range from the practical to the experimental. Rather than trying to mimic what already exists, Procreate aims to push the bounds of what is possible using the unique strengths of digital art.
A summary of each Brush Set is below. Experiment with the different brushes to explore what's possible. Discover the wide variety of effects you can achieve and what works best for you.
Sketching
Designed for practical drawing, planning, sketching and quick studies. These brushes mimic graphite pencils, technical pencils, pastels and artist crayons.
Drawing
This set of brushes offers a range of rendering brushes for artistic drawing. These brushes offer a versatile mix of wet and dry mediums and are ideal for quick studies and life drawing.
Inking
Ideal for cleaning up artwork and drawing in ink-centric styles like sumi-e. These brushes include a variety of ink-and-brush styles, technical pens, markers, gel pens, and dry ink effects.
Painting
These brushes encompass a range of realistic and digital painting effects. This selection of brushes covers mediums from acrylic to stucco to oil. They offer a range of brush behaviors including the drag of an aged brush and the smear of an oil brush loaded with turpentine.
Artistic
Texture is the focus of this fascinating brush set. These brushes offer a range of effects from watery to clumpy. They build up or strip away color to reveal an underlying texture of paper or canvas.
Calligraphy
These brushes all have Streamline enabled. This allows letterers to create smooth and even calligraphic forms. They come in a variety of textures with particular responsiveness to pressure.
Airbrushing
A staple of classic digital art. The airbrush set allows artists to lay down pure color and smooth gradients fast.
Textures
These brushes lay down large areas of texture fast. This versatile set offers a unique and eclectic set of realistic textures that mimic a wide range of surfaces and patterns.
Abstract
This playful set demonstrates the unique capabilities of Procreate’s versatile Brush Studio. Included are brushes that change color, create smoky effects and generate chaotic shapes. This is a good demonstration of the unexpected effects brush customization can achieve.
Charcoals
This range of realistic charcoal brushes is ideal for studies, portraits, and life drawing.
Elements
These fantastical effects brushes render convincing smoke, flames, water, clouds, and more.
Spraypaints
A variety of convincing spatter and spray effects are available in this grungy and versatile brush set.
Materials
A variety of Material brushes featuring metallics and roughness created for 3D Painting. Plus a selection of brushes to add fine touchups like hair, stubble, noise, and several styles of skin texture to turbocharge your concept art.
Vintage
A vintage-inspired brush set with a range of retro textures and scattered design elements for your creations.
Luminance
This mind-blowing brush takes full advantage of the power of digital art. It creates a range of vivid light effects from pulses to galaxies, sparkles, and bokeh.
Industrial
Designed to add realistic grunge textures to your art. The Industrial set is where you’ll find concrete, metal, stone, and rust effects.
Organic
The Organic brush set offers all things natural. It includes a range of scatter brushes to add grass, leaves, and bark textures to concept pieces. It also offers brushes that mimic the strokes created by handmade mediums. This allows you to ink with a reed, draw with bamboo, or paint with a sable brush.
Water
This set offers several realistic watercolour brushes. It includes stamp brushes for splashes, flicks, blotches and drips.
Brush Library Basics
Learn how to create your own brushes and brush sets, import sets created by others, keep your Library organized, and share your creations.
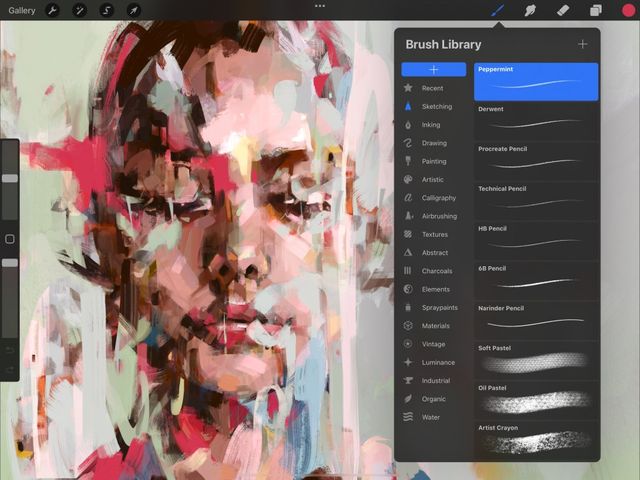
In this section we'll explore the controls for managing individual Brushes and organizing Brush Sets.
Add
Create custom Brush Sets to store your modified brushes and new creations.
Drag down the list of Brush Sets to reveal a blue highlighted + button. Tap it to add a new Brush Set at the top of the list.
Enter a name for your new Brush Set using the iOS Keyboard. Hit Return or tap anywhere outside the iOS Keyboard to commit your change.
To add a new brush, tap the + button on the top right of the Brush Library to enter the Brush Studio.
Learn more about creating brushes in the Brush Studio .
Edit
Change a wide array of settings on any existing brush.
To edit an existing brush, tap the brush to select it, then tap it again to bring up the Brush Studio.
Learn more about editing existing brushes in Brush Studio Settings .
Organize
Drag and drop brushes and Brush Sets to new positions in the list. Pick up multiple items to rearrange your Brush Library fast.
Tap and hold the brush or Brush Set you want to move. After a moment, it will ‘lift up’ and darken. Drag it to a new position in the list and lift your finger to release it.
To move multiple brushes or Brush Sets, pick up the first item as above and drag it. A green + icon will appear on it. With another finger, tap any other items you want to add to the stack. A number will appear next to the + icon counting how many items your stack holds. You can now drop the stack into a new position in the list.
To move a brush from one Brush Set to another, pick it up, hover it over the destination Brush Set, and drop it.
You can also pick up the brush you want to move, tap your destination Set with another finger. This will instantly switch to the new Set, then drop your brush there.
If you drag a default Procreate brush, the original will remain in place and unchanged. The destination brush Set will have a duplicate of that brush placed in it.

Duplicate
When you want to customize a default Brush Set, make your own copy for total control over the contents.
You can’t delete or rename Procreate’s default Brush Sets. You also can't delete default brushes from within those core sets. But there is a way to create a totally customizable version of any core Procreate Brush Set.
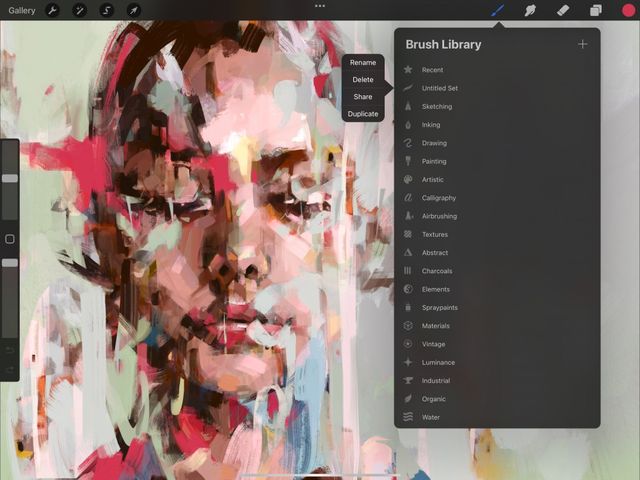
Tap on the Set you want to edit, then tap Duplicate. An exact copy of the Set will appear below the original. A swoop icon on a Brush indicates this is a copy, and will bear the name of the original plus a number. For example, the first copy you make of Vintage will be Vintage 1.
This set is now a custom set, which means you can Rename, Delete, or Share the set. You can also adjust, name, delete or share your own versions of the brushes within it.
To Duplicate a brush, swipe left on it and tap Duplicate. This is a safe way to experiment with the settings. It also lets you keep an unchanged version of the original.
Rename
Give your custom brushes and Sets memorable names to keep your Library organized.
To change the name of a Brush Set, tap on it to select. Tap on it again to bring up the Options menu. Tap Rename.
You can’t rename Procreate’s default Brush Sets. You can however duplicate a default Brush Set and rename the copy.
Delete
Tidy up your Brush Library by deleting unwanted duplicates and unused custom brushes.
To delete a custom Brush Set, tap it to select it. Tap it again to invoke the Options menu. Then tap Delete.
To delete a custom brush, swipe left on it, and tap Delete.
You cannot delete default Procreate brushes and Brush Sets.
Share
Share your custom brushes and Brush Sets with other Procreate users.
Share an individual brush by swiping left on the brush thumbnail and tapping Share. Procreate will package your brush into a .brush file that you can share any way you like.
Share a custom Brush Set by tapping the Set to select it, tapping again to bring up Options, and tapping Share. Select a destination for your .brushset file.
Pro Tip
Upload your original creations to forums or share them with friends by email or AirDrop. You can even sell your unique custom sets online.

Import
Download and import useful new brushes and Brush Sets into Procreate.
In the Brush Library, tap the + button to create a new brush. Next tap the Import button at the top right to import a .brush or .brushset file from the Files app.
An imported Brush Set will be added to the top of your Brush Library.
You can also import new brushes from outside the app. Locate a new .brush or .brushset file in Files, online, or in an email. When you tap the file, it will either automatically import into Procreate, or a prompt to import the new brush to Procreate will appear.
A folder called Imported is created when you import a single brush. It will be placed in here. The Imported folder will be at the bottom of your Brush Sets list.
If you import a Brush Set this way, it will appear at the top of your Brush Library.
Sorry. We’re having trouble copying to your clipboard.
Try directly copying the link below.
Still have questions?
If you didn't find what you're looking for, explore our video resources on YouTube or contact us directly. We’re always happy to help.
