Procreate Handbook
Sorry. We’re having trouble copying to your clipboard.
Try directly copying the link below.
Interface and Basics
Add Text, and access all the typography tools you need in one versatile panel.
Text Basics
Add and edit Text content in crisp vector format. Move and resize your Text box, and convert the results to raster graphics to add to your artwork.
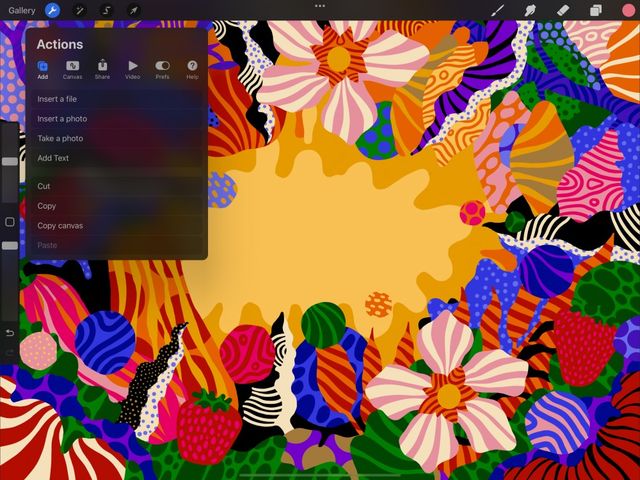

Add Text
Add Text to your document with a tap.
Tap Actions > Add > Add Text.
A bounding box containing the word Text will appear on your canvas. The text appears in your currently selected color, and uses Procreate’s default font, Eina.
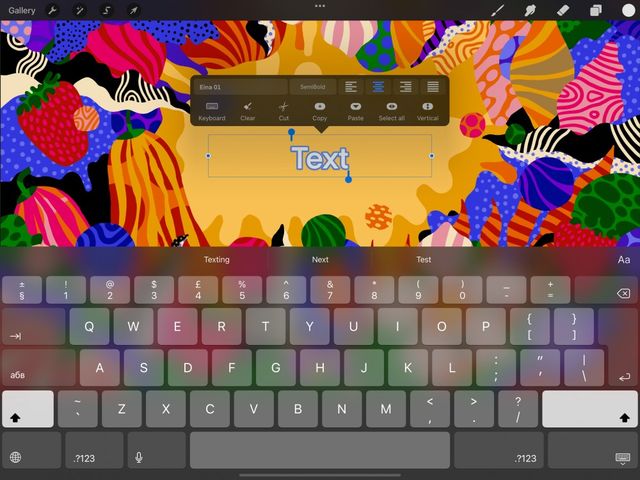
Edit Text
Use the Keyboard to type into your Text box or use Apple Pencil to Scribble.
When you add new Text to your canvas, the word Text is already highlighted and ready to type over. You can use the iOS Keyboard to type or Apple Pencil to Scribble in new text.
The Text box will expand to fit new content as the text changes.
To align, select, cut, copy, paste or select the font style, double tap your Text to invoke the Text Entry Companion.
To further adjust your text’s font, style, design and attributes, tap the font name in the Text Entry Companion. This will invoke the Edit Style Panel.
Click here to find out more about the Edit Style Panel .
Pro Tip
To quickly select a new font you can Scribble the name of the font you want in the Font Style field and it will change automatically.
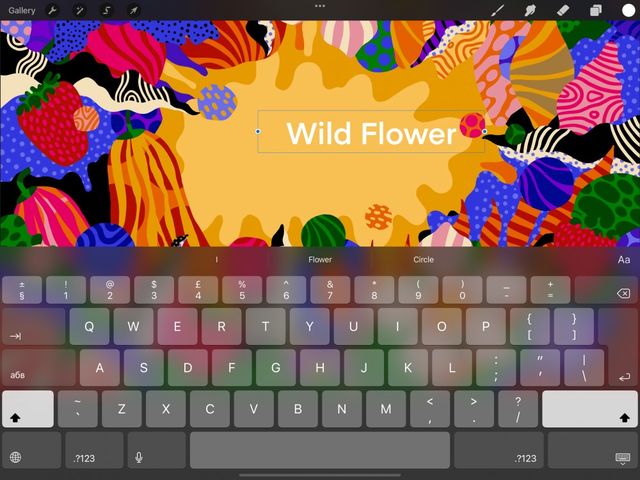

Move Text
Move your Text and resize the bounding box around it.
To move your Text, drag the active bounding box around the canvas. While Text remains in vector mode (see below), it can sit off the edge of the canvas without being cut off.
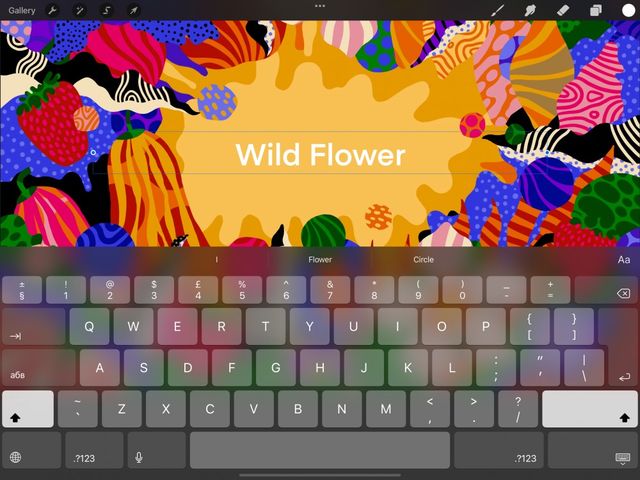

Resize Text Box
To widen or shrink your Text box, drag the blue nodes on either side of the bounding box.
Resizing your Text box will only change the shape of the container. It won't change the shape or size of the text inside the box, .
If you make the bounding box narrower than the text inside, the text will break onto multiple lines.
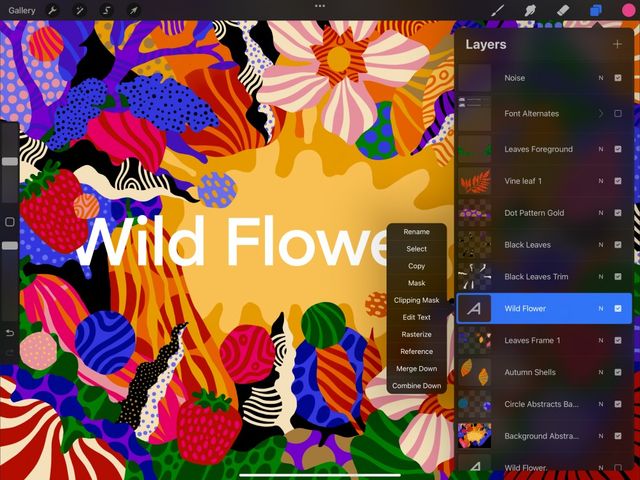

Vector Text vs Raster Text
Keep your Text in crisp editable vector form for basic edits. Rasterize it into a pixel-based image to create more complex effects.
Vector Text can resize up and down without loss of quality. Vector also lets you retype and change Text box with no quality loss.
To use certain Procreate tools, you must rasterize your Text. Rasterizing turns text into pixel data that you can paint, distort, merge and more.
Pro Tip
In the Layers panel, rasterized Text layers are normal layers, and appear as such.
Using Vector Text you can:
Type in new content
Change font, style, spacing and alignment
Add underline, outline, and capitalization effects
Using Vector or Raster Text you can:
Move your Text around
Make uniform Transformations
Change opacity
Add Clipping Masks and Layer Masks
Group Text with other layers
Using Raster Text you can:
Use any other Procreate function on it, including Selections, Transformations, Adjustments and Merging
In the Layers panel, you can identify vector Text by the ‘A’ visible in the Text layer thumbnail. The layer name will also automatically change to reflect its Text content.
Pro Tip
You can override the automatic naming of a vector Text layer. Tap the Text layer to bring up the Layer Options menu, then tap Rename.
To rasterize your text, tap the Text layer in the Layers palette. This invokes the Layer Options menu, where you can tap Rasterize.
Sorry. We’re having trouble copying to your clipboard.
Try directly copying the link below.
Still have questions?
If you didn't find what you're looking for, explore our video resources on YouTube or contact us directly. We’re always happy to help.