Procreate Handbook
Sorry. We’re having trouble copying to your clipboard.
Try directly copying the link below.
Interpolation
There's more than one way to interpolate a pixel. Here's where you can fine-tune the engine behind the Transform tool.
How Interpolation Works
Interpolation is the method used to adjust the pixels in an image when scaled, rotated, or transformed.


Imagine your image is a single red dot - one pixel - sitting in a grid, and you want to make it bigger. When you transform that pixel, the grid stays the same but the red dot grows. To do this, the red dot needs to take up more spaces on the grid. Where it was just one pixel, now it might take up two pixels, or four, or many more. Procreate needs to figure out where those pixels sit and what they look like. Procreate looks at the image you have, and makes guesses to fill in the blanks created when that image expands to take up more space.
Now imagine this happening to every single pixel in a full illustration when you've got different colored pixels next to each other. Interpolation is how Procreate figures out how many more (or less) pixels it needs to give the image to make a new size or shape. And, how those pixels position so the edges between different colors in your artwork stay as clear as possible. Interpolation does all this, even when your image may have been stretched, squashed, or rotated on that grid.
Pro Tip
Every time you resize an image, the interpolation process happens again. After a few times, you might start to see the edges in your image degrading and looking fuzzy. Think of this like making a photocopy of a photocopy of a photocopy. You lose a little more quality each time you transform. Try to avoid repeatedly transforming the same part of your image.
Interpolation Methods
Improve your Transformation results by using the best interpolation setting for your work.
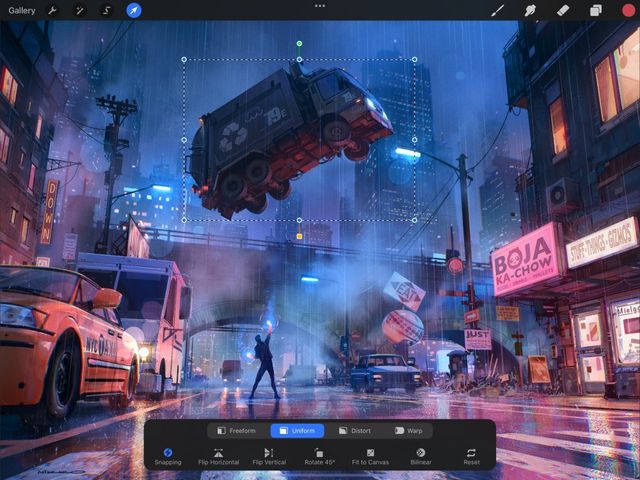
The Interpolation setting is the circular icon second from the right in the Transform bar. By default, Interpolation is set to Nearest.
When you tap Nearest, you are offered three choices, each with its own advantages. Choose the one that best suits your purpose.
Pro Tip
The label of this icon changes to reflect your current Nearest, Bilinear, or Bicubic Interpolation mode. But, the icon graphic will always look the same.
Nearest Neighbor is the simplest and fastest type of interpolation. It only considers one pixel on each side of the edge when calculating how to display the transformed result. This can sometimes make the end result seem jagged. But for quick and simple single transformations, it's generally a fine option.
Bilinear interpolation considers a 2x2 area of pixels surrounding the edge and delivers a weighted average of all four. It takes more processing time, but will usually give you a smoother result than Nearest Neighbor.
Bicubic interpolation considers an area of 16 surrounding pixels. This gives more importance to the pixels that are closer to the edge. Because of this, it is the slowest of the three methods, but offers the sharpest and most accurate result.
Sorry. We’re having trouble copying to your clipboard.
Try directly copying the link below.
Still have questions?
If you didn't find what you're looking for, explore our video resources on YouTube or contact us directly. We’re always happy to help.
