Procreate ハンドブック
クリップボードにコピーができませんでした。
以下のリンクをコピーしてみてください。
Blur
Smooth and soften your image with Gaussian Blur, create the illusion of fast movement using Motion Blur, and use Perspective Blur to add zooming and directional blasting effects.
Gaussian Blur
Smooth out your active layer to give your image a soft, out-of-focus appearance. Easily undo, redo, reset and cancel your adjustments.


Tap Adjustments > Gaussian Blur to enter the Gaussian Blur interface.
Slide right and left to change the amount of Gaussian Blur.
At the top of the screen, you’ll see a blue bar labelled Slide to adjust. This bar displays how much blur is applied to the image.
Initially, it will be set at 0% - no blur. Drag your finger right to increase the amount of blur, and slide it left again to reduce the blur.
Control and edit your changes with simple buttons.
The buttons along the bottom of the screen offer four options:
Cancel all your changes and exit out of the Gaussian Blur interface;
Undo your last change;
Redo the change you just undid;
Reset all changes but remain in the Gaussian Blur interface.
Commit Changes
Commit or cancel all changes with one touch.
To commit your changes, tap the Adjustments icon again, or tap any other tool.
To exit the Gaussian Blur interface without committing changes, tap Cancel.
Motion Blur
Create the illusion of speed and motion by applying a streaky blur to your active layer. Easily undo, redo, reset and cancel your adjustments.
Tap Adjustments > Motion Blur to enter the Motion Blur interface.
Slide right and left to change the amount of Motion Blur.
At the top of the screen, you’ll see a blue bar labelled Slide to adjust. This bar displays how much blur is applied to the image.
Initially, it will be set at 0% - no blur. Drag your finger left or right to increase the amount of blur in the direction of your finger movement. For example, if you slide your finger diagonally, you will create a diagonal Motion Blur.
Control and edit your changes with simple buttons.
The buttons along the bottom of the screen offer four options:
Cancel all your changes and exit out of the Motion Blur interface;
Undo your last change;
Redo the change you just undid;
Reset all changes but remain in the Motion Blur interface.
Commit Changes
Commit or cancel all changes with one touch.
To commit your changes, tap the Adjustments icon again, or tap any other tool.
To exit the Motion Blur interface without committing changes, tap Cancel.
Perspective Blur
Create a full or directional radial blur for zooming and blasting effects. Easily undo, redo, reset and cancel your adjustments.


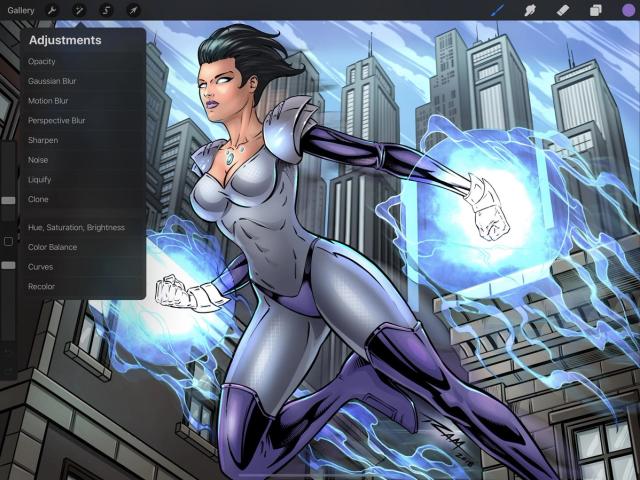
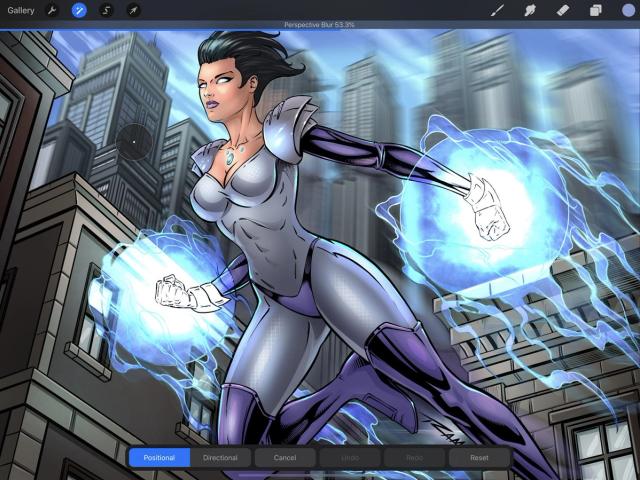
Tap Adjustments > Perspective Blur to enter the Perspective Blur interface.
Touch Controls
Drag the disc to center your Perspective Blur, and slide right and left to change the intensity.
A disc will appear in the middle of the screen. This sets the point of origin for the Perspective Blur. Drag it to move it at any time while creating your blur.
At the top of the screen, you’ll see a blue bar labelled Slide to adjust. This bar displays how much blur is applied to the image. Initially it will be set at 0% - no blur.
Drag your finger to the right, anywhere outside the disc, to increase the amount of blur. Slide your finger left again to reduce the blur. You can also keep moving the disc around after applying the blur to see how the effect looks in different positions.
Interface
Control and edit your changes with simple buttons.
The buttons along the bottom of the screen offer two modes of Perspective Blur, and four options:
Positional mode radiates a blur outwards from the disc in every direction.
Directional mode radiates a blur from only one side of the disc.
プロの技
When you are in Directional mode, the disc is larger and includes an arrow that displays which way your blur is pointing. You can spin this arrow around to change the blur's direction.
Cancel all your changes and exit out of the Perspective Blur interface;
Undo your last change;
Redo the change you just undid;
Reset all changes but remain in the Perspective Blur interface.
Commit Changes
Commit or cancel all changes with one touch.
To commit your changes, tap the Adjustments icon again, or tap any other tool.
To exit the Perspective Blur interface without committing changes, tap Cancel.
クリップボードにコピーができませんでした。
以下のリンクをコピーしてみてください。
お探しのものが見つかりませんか?
探しているものが見つからない場合は、YouTube動画のリソースを検索するか、直接お問い合わせください。いつでも喜んでお手伝いさせていただきます。

