Procreate ハンドブック
クリップボードにコピーができませんでした。
以下のリンクをコピーしてみてください。
Interface
Give your art professional finishing touches with the extraordinary capabilities of the Adjustments menu.
The Adjustments Menu
Access cinema-quality filters and effects in the powerful Adjustments menu.


Adjustments Button
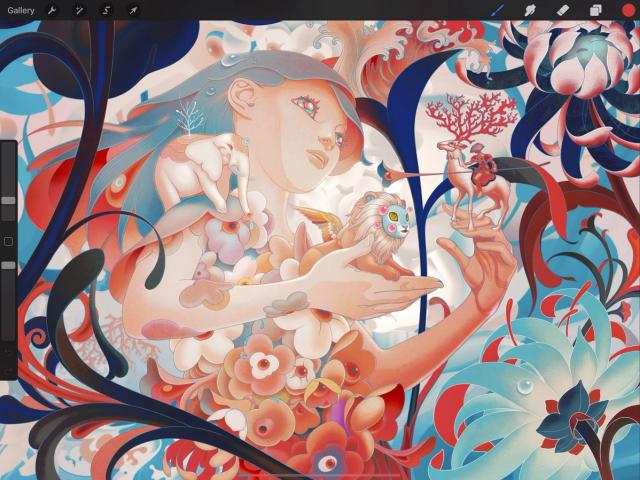
In the top menu bar you’ll find a magic wand symbol. This is the Adjustments button.
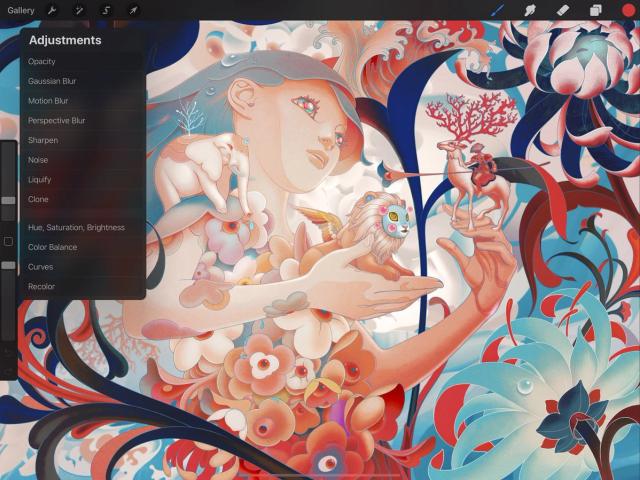
Tap it to open the Adjustments menu.

Adjustments Menu
Polish your image with two different types of Adjustment.
Filters
The top half of the Adjustments menu offers seven powerful filters for fast and simple image adjustments and fun special effects.
Tap a filter to activate it, then adjust it using the on-screen gestures described below.
AdjustmentsThe bottom half of the menu is dedicated to color adjustments. Designed with professionals in mind, these four versatile tools are used to tweak and balance the colors in your image. You can even make sweeping Recolor changes in an instant.
Tap an adjustment to activate it, then apply it using the toolbar at the bottom of the screen.
When activated, an adjustment affects your current primary layer .
Filters
Blur, sharpen, texturize and Liquify your image: Procreate offers a range of special effects with these seven powerful filters.
The top half of the Adjustments menu is devoted to Filters: quick tools designed to instantly create a variety of fun, punchy visual effects. Read on for an overview, and explore each tool in more depth through the Handbook pages to follow.
Make your image transparent.
Change the transparency of your current layer by dragging your finger left or right.
Learn more about Opacity .
Smooth and soften your image.
Give your image a soft, out-of-focus look. Drag your finger right or left to apply an even blur to your current layer.
Learn more about Blur .
Create the illusion of fast movement.
Create the appearance of speed and motion by applying a streaky blur to your layer in the direction you drag your finger.
Learn more about Blur .
Create zooming and blasting effects.
Drag a disc into place to set the center point, and drag outside it to create a blur that radiates in every direction on the Positional setting, or in a single direction on the Directional setting.
Learn more about Blur .
Bring out the detail in your image for a crisp, focused look.
Drag your finger left or right to set the level of sharpening you apply to your image.
Learn more about Sharpen .
Add grain to your image for the organic feel of old film stock or newsprint.
Increase or decrease the graininess of your image by dragging your finger right or left.
Learn more about Noise .
Morph the pixels in your layer to create a variety of mind-bending warp effects.
Paint extraordinary Liquify effects into your image with the touch of a finger. Select from Push, Twirl, Pinch, Expand, Crystals, and Edge modes. Control the size, distortion, pressure and momentum of the effect, tweak the amount, and reconstruct your image or reset all changes.
Learn more about Liquify .
Instantly paint one part of an image onto another part of it for quick and natural duplication.
Replace one part of an image with another part, instantaneously. Position a disc over the part of the image you want to duplicate, and paint where you want the new copy to appear.
Learn more about Clone .
Adjustments
Take your art to the next level with industry-standard color adjustment tools.
The bottom half of the Adjustments menu is devoted to color adjustments, offering a variety of ways to create perfectly balanced images. Read on for an overview, and explore each tool in more depth through the Handbook pages to follow.
Tweak the color value, vibrancy and lightness in your image with simple sliders.
Quickly adjust Hue, Saturation and Brightness using simple sliders to make striking changes to your image.
Correct or stylize your color scheme by changing the balance of hues that make up your artwork.
Finely adjust the tonal values of your artwork with sliders for color balance and buttons to apply changes only to key tones of your artwork: highlights, midtones, or shadows.
Modify the color and tonal balance in your image in one smooth motion using the intuitive Curves graph.
Tweak the overall gamma and amounts of Red, Green, and Blue in your image using an intuitive curve and a helpful histogram that clearly represents the distribution of color in your image.
Quickly change and replace areas of color and see the results with a live preview.
Drag crosshairs to select the color you want to replace, select a new color using the Color button, and use the Flood slider to set the threshold your new color fills. Recolor works best on areas of flat color.
Learn more about Color Adjustments .
クリップボードにコピーができませんでした。
以下のリンクをコピーしてみてください。
お探しのものが見つかりませんか?
探しているものが見つからない場合は、YouTube動画のリソースを検索するか、直接お問い合わせください。いつでも喜んでお手伝いさせていただきます。