Procreate ハンドブック
クリップボードにコピーができませんでした。
以下のリンクをコピーしてみてください。
Liquify
Liquify warps the pixels of a layer in five different ways to create mind-bending effects.
Liquify
Discover five wildly different ways to distort your layer.


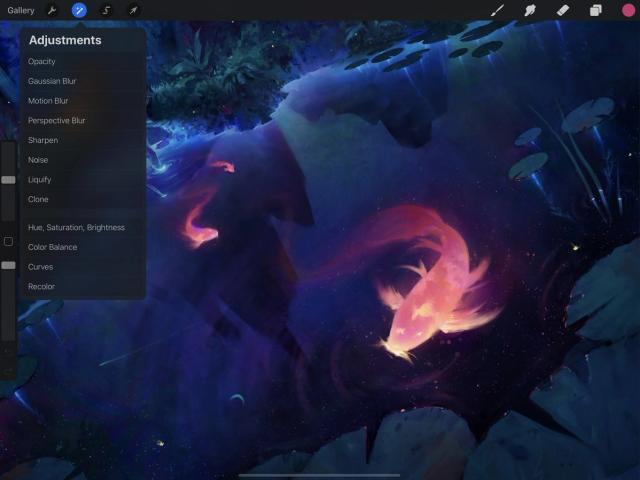
Tap Adjustments > Liquify to enter the Liquify interface.
Rather than using a simple drag motion to apply effects, Liquify works like a brush - you ‘paint’ your effects onto the canvas using your finger or the Apple Pencil.
Liquify offers five different modes. Combined with each other or with different tools, they create an endless variety of useful and unusual image effects.

Modes
Apply Push, Twirl, Pinch, Expand, Crystals, and Edge effects to your art.
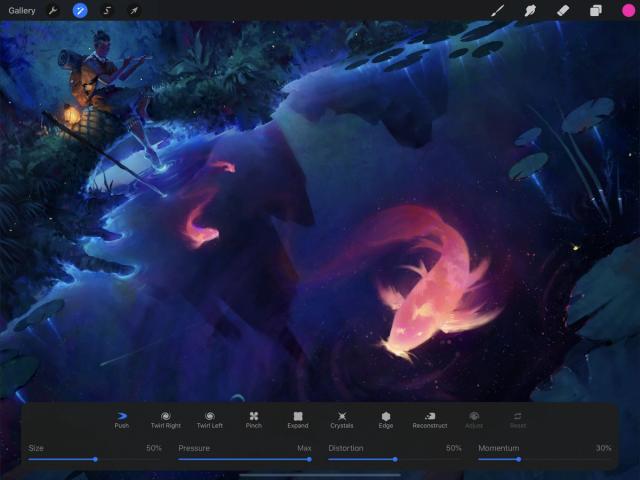
The leftmost button in the bottom menu is set to Push by default. Tap it to bring up the Liquify Mode list, and tap the mode you want to use.
Push is like a powerful smudge. It moves your pixels in the direction of your stroke.
Twirl has a left and right setting, and twists your pixels around your stroke.
Pinch sucks surrounding pixels in towards your stroke.
Expand pushes surrounding pixels away from your stroke, creating a ballooning effect.
Crystals pushes surrounding pixels away from your stroke unevenly, creating the effect of small sharp shards.
Edge sucks surrounding pixels inwards to a line rather than a point, appearing to fold two halves of the image together.
Reconstruct is a little different. Paint using this effect to gradually restore the original artwork under the current Liquify effects. This is useful when you’ve Liquified one part of your image too much and want to restore that area without losing the rest of your effects.
Touch Controls
Vary your pressure with the Apple Pencil for total control over your Liquify effects.
Adjust the Pressure slider to control the maximum effect you can apply with the Apple Pencil at full pressure.
Using Liquify with a finger will always apply the maximum effect set on the Pressure slider, without the pressure variance of the Apple Pencil.
In many ways Liquify is like a standard brush, which gives you a lot of control over how it behaves.
The sliders along the bottom of the screen offer options for your Liquify brush.
Dynamics
Controls your ‘brush’ size, determining how much area Liquify will affect.
Determines how strong the effect will be depending on how hard you press with the Apple Pencil.
Introduces chaotic elements into your effects to make them more twirly, jagged, or twisted.
Keeps your Liquify effect continuing after you lift off the canvas, as though the effect ‘overshoots’ your stroke.

Adjust and Reset
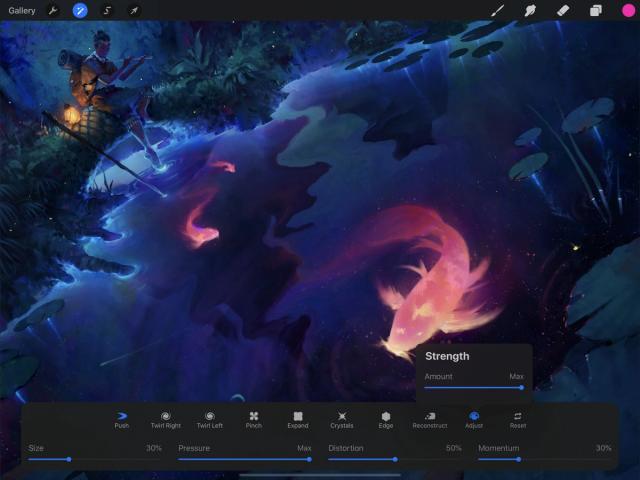
Tap the Adjust button for even more control, or Reset to undo your changes.
Once you’ve made changes with Liquify, the Adjust and Reset buttons become available.
Tap Adjust to reveal the Amount slider. Drag it to the left to reduce the strength of the effect you just applied.
Tap Reset to undo your changes and remain in the Liquify interface.
Commit Changes
Commit or cancel all changes with one touch.
To commit your changes, tap the Adjustments icon again, or tap any other tool.
To exit the Liquify interface without committing changes, tap Reset, then tap the Adjustments icon again, any other tool.
プロの技
Use Liquify with Symmetry to create incredible effects.
クリップボードにコピーができませんでした。
以下のリンクをコピーしてみてください。
お探しのものが見つかりませんか?
探しているものが見つからない場合は、YouTube動画のリソースを検索するか、直接お問い合わせください。いつでも喜んでお手伝いさせていただきます。
