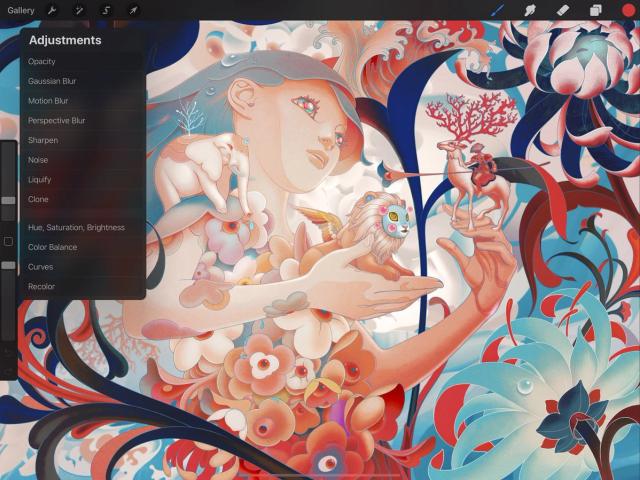
Procreate ハンドブック
クリップボードにコピーができませんでした。
以下のリンクをコピーしてみてください。
Color Adjustments
Take your art to the next level with industry-standard color adjustment tools. Adjust Hue, Saturation and Brightness, tweak your Color Balance, experiment with Curves over a helpful histogram, and Recolor parts of your image with ease.
Hue, Saturation, Brightness
Tweak the color value, vibrancy and lightness of any layer with simple sliders.
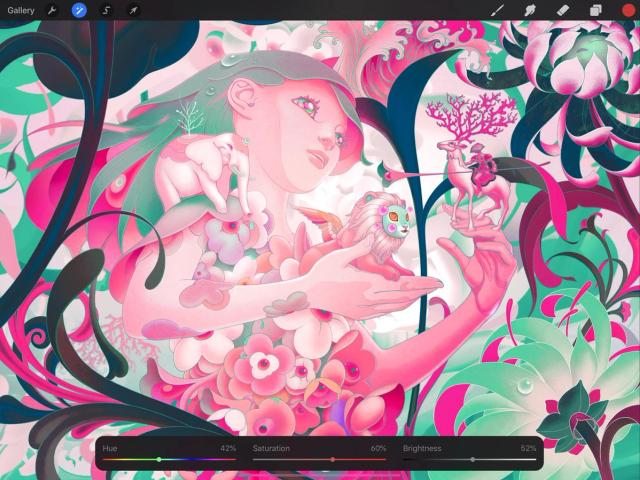
HSB is the simplest way to make quick color adjustments.
Tap Adjustments > Hue, Saturation, Brightness to enter the HSB interface.
Interface
Three sliders give you control over the general quality of color in your image.
Hue determines the overall color tone used in the image. This slider is a spectrum of all available shades of color.
Saturation determines color strength. Move the slider left to desaturate the color down towards gray, and right to make the color as vibrant as possible.
Brightness sets the overall lightness or darkness of the image.
Commit Changes
Commit or cancel all changes with one touch.
To commit your changes, tap the Adjustments icon again, or tap any other tool.
Two-finger tap to Undo your changes.
Color Balance
Correct or stylise your color scheme by changing the balance of hues that make up your artwork.
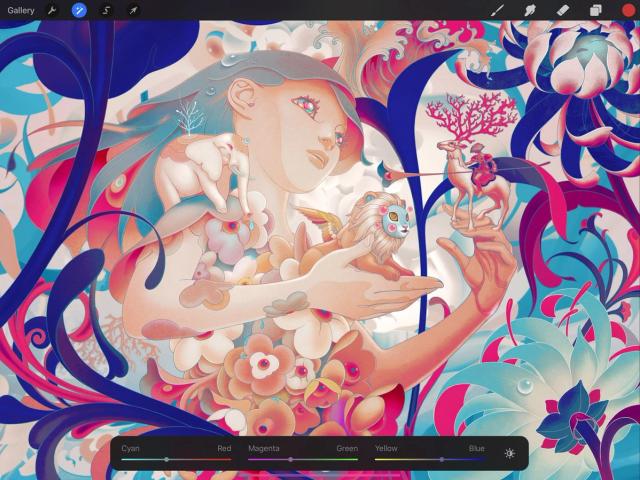
Colors on-screen are formed of a mixture of three primaries: red, green, and blue. Combining these three values in different ways allows for over sixteen million unique shades of color.
Changing the mixture of those colors with Color Balance gives you the power to make quick color corrections on your image, or push colors to the limit to create stylisation.
Tap Adjustments > Color Balance to enter the Color Balance interface.
Interface
Use RGB sliders and Highlights / Midtones / Shadows buttons to tweak the colors of your active layer.
Color Balance splits Red, Green, and Blue into their own sliders, with each color balanced by its opposite (Cyan, Magenta, and Yellow).
It also splits the Highlights, Midtones, and Shadows of your image into three sections so you can more finely control which parts of your image are affected by your color changes.
Sliders
Slide to the right to move the tone of your layer towards Red, Green, or Blue. Slide to the left to shift towards Cyan, Magenta, or Yellow.
Buttons
Tap Shadows, Midtones, or Highlights to choose which part of your image will be affected by your color changes - the darkest parts, the middle tones, or the brightest areas.
プロの技
Adjusting the Midtones is the best way to achieve an even adjustment. Midtones are selected by default when you open Color Balance.
Commit Changes
Commit or cancel all changes with one touch.
To commit your changes, tap the Adjustments icon again, or tap any other tool.
Two-finger tap to Undo your changes.
Curves
Modify your layer’s color and tonal balance in one smooth motion using powerful Curves.
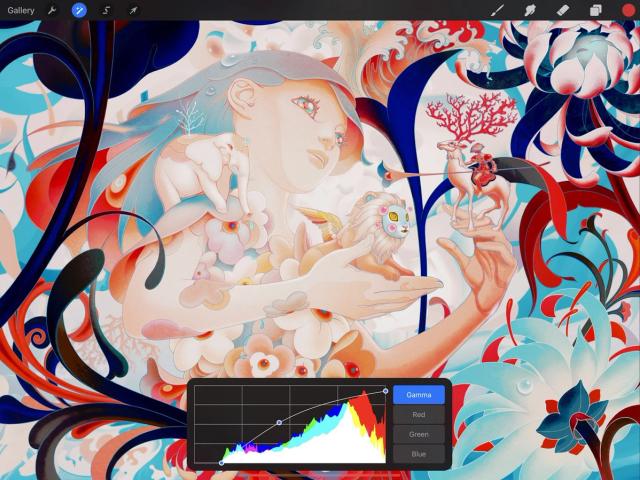
Curves offer by far the most advanced way to adjust color and contrast in your image.
Tap Adjustments > Curves to enter the Curves interface.
Overview
This tool represents the tonal values of your layer as a straight line on a graph. You can bend this line into curves that affect the colors of your image in a variety of ways.
The colored part of this graph is called a histogram. It’s a map of where each color appears in your image, and how much of it there is, and it can help you visualise how your changes will affect the overall color balance of your layer.
Interface
Nodes
Drag a node up to affect the lightness of your layer. Drag a node down to affect the darkness. Drag a node left or right to affect contrast.
You can add up to 11 nodes. To remove a node, tap it, then tap Delete.
The best way to understand how curves work is to experiment with them and watch how your layer changes.
Histogram
The histogram is an graphical representation of the balance of red, green, and blue color in your image. Colors other than red, green, and blue indicate the channels overlapping. For example, purple means that blue and red are both present in that part of the image, while white means all three channels are active.
Gamma and Channels
By default, when you start using curves you’re changing the overall gamma, which means you are adjusting all three color channels - red, green, and blue - at the same time.
Tap Red, Green, or Blue to start adjusting a color channel in isolation. Adjusting curves on individual color channels allows practically limitless control over color corrections and effects.
Commit Changes
Commit or cancel all changes with one touch.
To commit your changes, tap the Adjustments icon again, or tap any other tool.
Two-finger tap to Undo your changes.
Recolor
Quickly change and replace areas of color and see the results with a live preview.
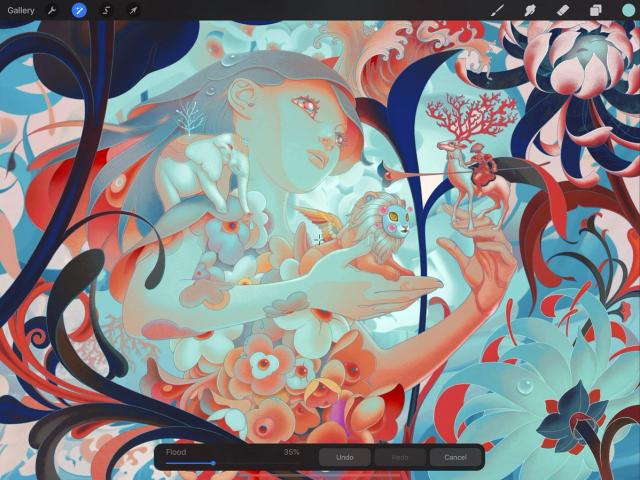
Tweak specific areas of color without the need to erase, cut, or re-paint existing shapes.
Tap Adjustments > Recolor to enter the Recolor interface.
プロの技
Recolor works best on flat colors.
Touch Controls
Use the crosshairs, Color button and Flood slider to replace any color in three easy steps.
Small crosshairs will appear in the middle of the screen. Drag the crosshairs to an area of color you want to replace.
Tap on the Color button to select a replacement color.
Finally, slide the Flood slider at the bottom of the screen. Your chosen color will gradually fill with the replacement color. The further to the right you drag the Flood slider, the more easily the new color will spill over into other similar shades.
If you want to replace a different area with your new color, you can drag the crosshairs around at any time to see the effects of the flood fill elsewhere in your layer. You can also tap the Color Button at any time to switch to a different replacement color.
Interface
Control and edit your changes with simple buttons.
The buttons along the bottom of the screen offer three options:
Undo your last change;
Redo the change you just undid;
Cancel all your changes and exit out of the Recolor interface.
Commit Changes
Commit all changes with one touch.
To commit your changes, tap the Adjustments icon again, or tap any other tool.
クリップボードにコピーができませんでした。
以下のリンクをコピーしてみてください。
お探しのものが見つかりませんか?
探しているものが見つからない場合は、YouTube動画のリソースを検索するか、直接お問い合わせください。いつでも喜んでお手伝いさせていただきます。
