Procreate ハンドブック
クリップボードにコピーができませんでした。
以下のリンクをコピーしてみてください。
Interface and Gestures
Learn the basics: rotate, flip, fit to screen, make magnetic adjustments, use touch shortcuts to nudge, zoom and pan, and tweak image interpolation for crisply scaled results.
Interface
Manipulate the size, shape, and positioning of an object with simple touch controls.
In the top menu bar you’ll find an arrow symbol. This is the Transform button.
When you tap the Transform button, it will automatically select the contents of your current layer, and bring up the Transform toolbar.
Activating Transform automatically selects the contents of your current layer.
This selection appears as a bounding box outlined in moving dashed lines. It is the exact width and height of the content inside it.
Drag anywhere inside or outside the bounding box to move your content around.
Pinch-zoom inside the box to quickly scale your content up or down.
Transformation nodes are small blue handles used to transform the size and shape of your image content.
You will find Transformation nodes on the midpoints and corners of each side of your bounding box.
Drag a midpoint node to stretch and squash the selection along a single axis, or for a faster result, drag a corner node to resize the content along both axis at once.
The single green node above your selection is the Rotation node.
Drag the Rotation node to twist and turn your content. It will rotate around its own midpoint.
The buttons along the Transform toolbar at the bottom of the screen offer four different ways to manipulate the size and shape of the content in your bounding box.
When you first activate Transform, it defaults to the Freeform method. This is just one of the four different methods to manipulate your content. All four options are explored more fully in the Handbook sections to follow.
Freeform lets you stretch and squash your selection in any direction without maintaining the original ratio. For example, using Freeform, you can stretch your content to be far taller than it used to be, without changing the width.
Uniform preserves the original image ratio. If you stretch the content to be taller, it will automatically grow wider at the same time so it does not become distorted.
Distort makes it easy to create the appearance of perspective in an image. Drag a corner node to make that part of the image larger or smaller, or shear (tilt) your content by dragging a center node.
Warp offers the most complex effects. It applies a mesh to your selection, allowing you to move nodes on the outside of the mesh, or drag the inside of the mesh, to create a three-dimensional effect. You can even fold part of your image back over itself.
Tap any of the above buttons to switch to that transformation method.
Magnetics keep your transformations aligned and in proportion.
Tap the Magnetics button on the bottom toolbar to toggle Magnetics on and off.
When you move and transform your content with Magnetics on, blue lines will pop up on the screen, indicating particular positions, scales, or rotations that might be helpful. Your content will gently snap to those points.
プロの技
Magnetics is available in Freeform, Uniform, and Distort modes.
Use these helpful buttons as a shortcut for the most common transformations.
Quickly flip your content horizontally or vertically by tapping Flip Horizontal or Flip Vertical on the Transform toolbar.
Or, to rotate your content in fixed increments of 45° clockwise, tap Rotate 45°.
Instantly scale your Transform object to fill the canvas.
Procreate offers two ways to do this. Both preserve the aspect ratio of the image, so it won’t be stretched or squashed.
With Magnetics switched on, Fit to Screen will transform the contents to fit the canvas with maximum coverage. If the content is longer in one direction than the other, this might mean part of it overflows the canvas boundaries. Once committed, the overflow will be cropped off.
Without Magnetics, Fit to Screen will make the content as large as possible on the canvas without cropping any part of it. This may mean there is some space left around the edge of the image either horizontally or vertically.
Tweak how Procreate adjusts the pixels in your image when transforming it for best results.
Interpolation is the method used to adjust the pixels in an image that has been scaled, rotated, or transformed. You'll find this setting as a circular icon second from the right-hand side of the Transform bar. By default, Interpolation is set to Nearest.
When you tap Nearest, you are offered three choices, each with its own advantages. Choose the one that best suits your project.
Nearest Neighbor uses information from the nearest pixel to the interpolated point. This creates a sharp and accurate result, but can also leave the image with jagged edges.
Bilinear interpolation considers a 2x2 area of pixels surrounding the interpolation point, delivering a smoother image compared to the harder but more accurate result of Nearest Neighbor.
Bicubic interpolation considers a 4x4 area of surrounding pixels, and offers the smoothest result of all: however, the larger the sample area, the softer the image is likely to look.
プロの技
The label of this icon changes to reflect your currently-chosen Interpolation mode, displaying Nearest, Bilinear, or Bicubic. However, the icon graphic will always look the same.
Learn more about Interpolation .
The Reset button can revert all the changes you’ve made while in Transform mode, but it’s not the only option.
Tap the Reset button to disregard all changes you’ve made while in Transform mode. Your content will revert to its original state.
If you’ve been transforming your content over multiple steps and only want to undo the last adjustment you made, tap the canvas with two fingers to perform a standard Undo. To Redo, tap with three fingers.
プロの技
Once you leave Transform mode, Procreate compresses all your Transform actions into one step, making them into a single undo. You can change this behavior in Settings by toggling ‘Simplified Undos’ off. Procreate will then remember every step you take in Transform mode, allowing you to undo each stage one by one even after you’ve committed the whole Transformation.
Gestures
These natural gestures make Transforming your content quick and intuitive.
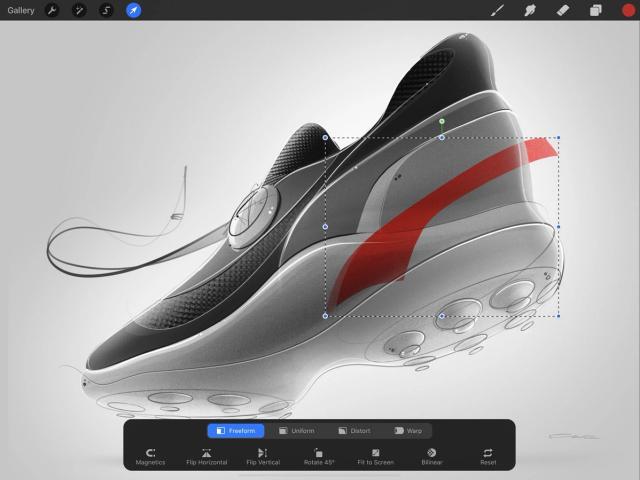

Move
Drag anywhere inside or outside of the bounding box to move your content around.
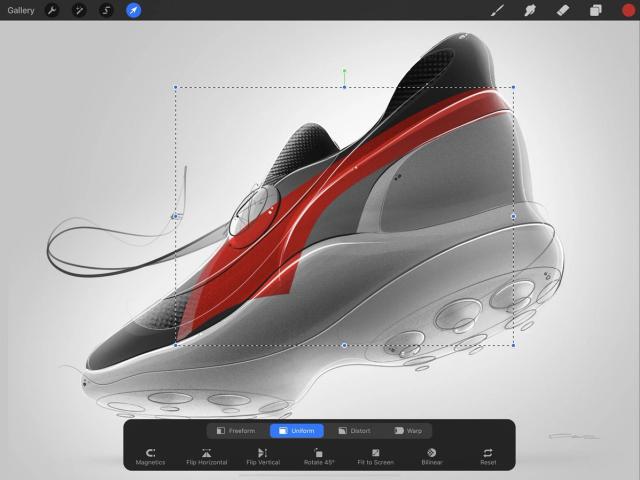

Scale
Pinch anywhere on the canvas to quickly scale your content up or down, keeping the ratio uniform.


Nudge
Tap anywhere outside the bounding box to nudge your selection in that direction in tiny steps. You can do this in Freeform, Uniform, and Distort modes. The closer you zoom in, the smaller the increment of movement will be.
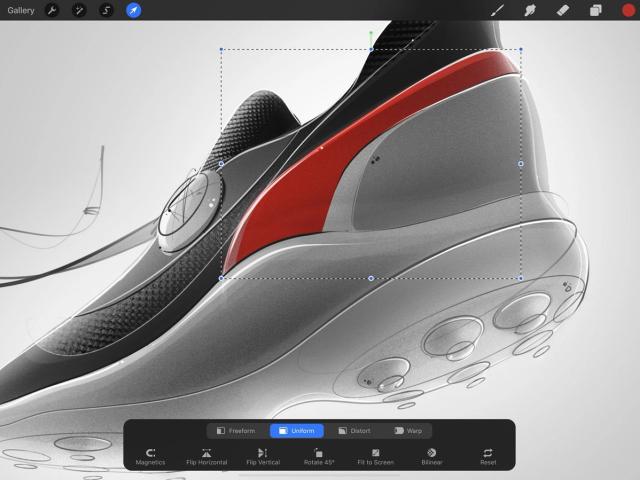


Zoom and Pan
Normally, pinching the canvas zooms it in or out, but in Transform mode this gesture is used to scale the content. If you need to zoom the canvas, hold the Transform button and pinch to adjust your zoom. Let go of the Transform button to go back to transforming your content with pinch-zoom.
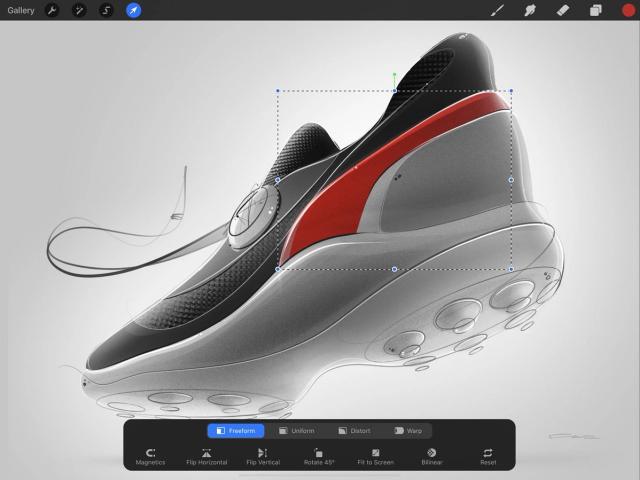

Commit
When you’re done, tap the Transform button to commit your changes and exit Transform mode.
クリップボードにコピーができませんでした。
以下のリンクをコピーしてみてください。
お探しのものが見つかりませんか?
探しているものが見つからない場合は、YouTube動画のリソースを検索するか、直接お問い合わせください。いつでも喜んでお手伝いさせていただきます。